|
|
|
||||||||||||||||
|
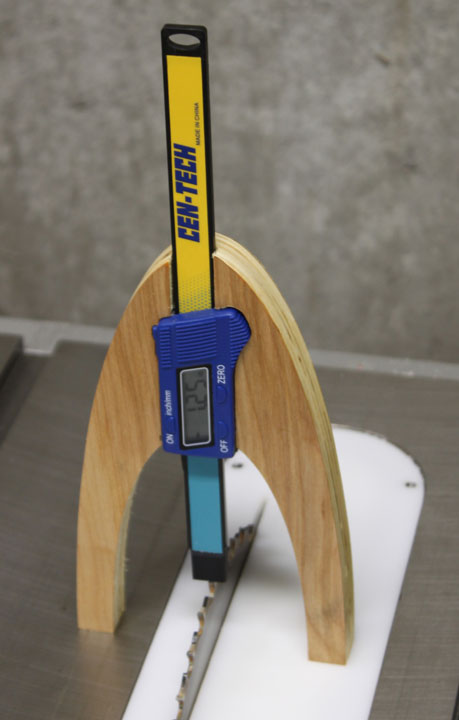
This is a build log of making a digital height gauge, like that shown above setting the height of the blade on my table saw. The availability of cheap and accurate digital calipers has been a real boon to anyone who wants a good fit in their work. In addition to their normal use, these things are now being modified for use as simple DRO's, drill press depth indicators, and many other uses. I saw an idea a few years back to make a height gauge using one of these, but I don't know who first had the idea - I would gladly acknowledge their ingenuity if I only knew who it was! The idea at that time was to make it using two layers of plywood, with an opening for the calipers cut out on a bandsaw. A height gauge is useful for setting the height of saw blades, router bits on a router table, setting planer blades, etc. and I needed one, so I decided to use my CNC to make it.
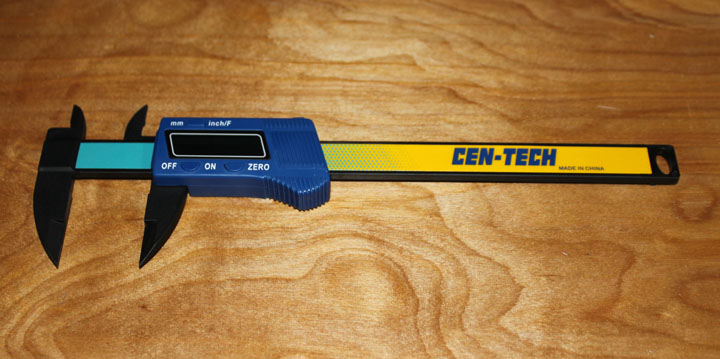
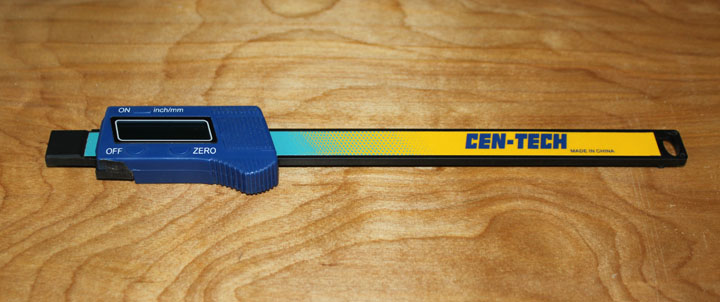
An example of such a caliper is shown in Figure 2, a $9.99 plastic set that is sold at Harbor Freight, item #93293 which only displays hundredths of an inch. There is also an $11.99 version, #99639 that will display several modes, including thousandths and fractional numbers (if you haven't committed decimal equivalents of common fractions to memory yet) and it uses exactly the same case. They can be even cheaper if you get them on sale or with coupons. Since we are only going to use this to measure depth, the jaws of the calipers will only get in the way. One of the reasons these calipers are so inexpensive is that they are made from composite materials, which also makes then easy to modify. A bit of sawing and sanding on both the sides of the slide gives us a squared end that looks like Figure 3.
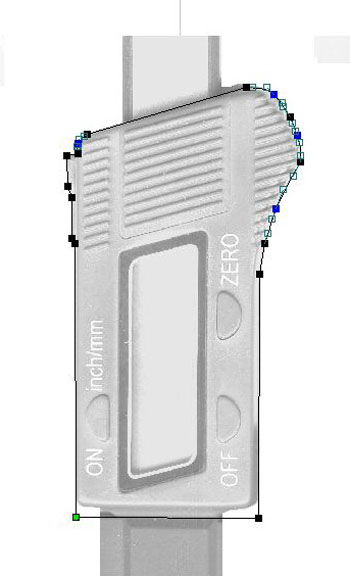
The next thing is to get a good vector drawing of the exact dimensions of the caliper. To do this, I simply placed the calipers face down on a flat bed scanner, which resulted in the image shown in Figure 4. Using V Carve Pro (or Aspire), I created a blank design for a material 7.5 by 9.0 inches that is .75 inches thick. I then imported the bitmap image from the scanner and traced around the outline of the object to be set into a pocket of the gauge. To do this, I first drew a simple rectangle around the object, and then, in node editing mode, added nodes (they are the dots on the lines in the figure) and moved them until they precisely fit around the image, as shown with the upper part done in Figure 4. Some of the nodes were marked as smoothing (or curved arcs) to make the bends needed.
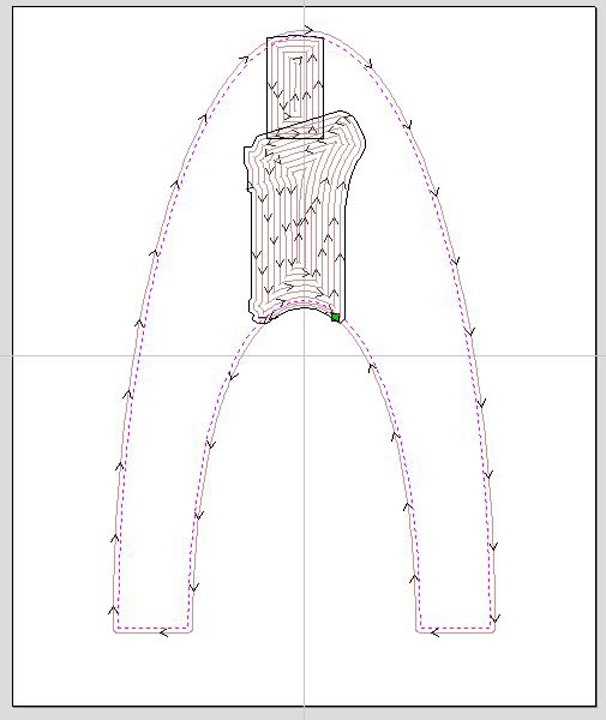
After the vector for the body of the caliper display (vector A) was done, another rectangular pocket for the slide was created (vector B), and then an overall arch for the unit to sit on a level surface (vector C.) The height of the tool was limited by the caliper's range of six inches. The final vectors are shown in Figure 6. I then created tool paths for an inside pocket operation of 0.40 inches for vector A, 0.30 inches for vector B, and an outside profile operation of .755 inches for vector C with 4 holding tabs. These tool paths are shown in Figure 7.
Fig. 8 V Carve Pro (and Aspire) also provides you a nice preview of what the cut will look like, which is shown in Figure 8.
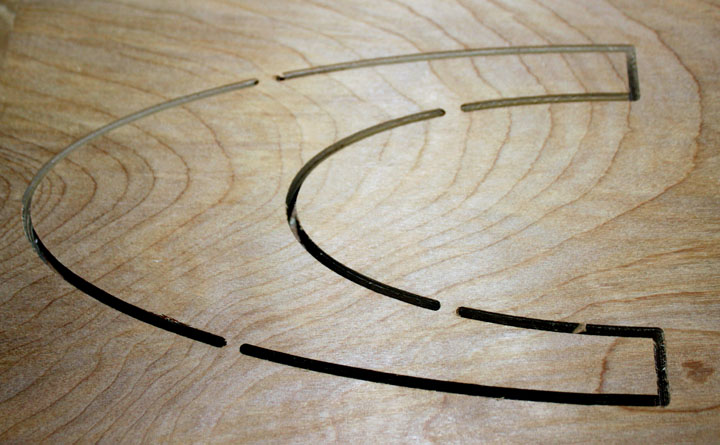
I chose a scrap piece of Baltic birch plywood for the frame, but you can use anything that will stand up to the needed strength, which really isn't much. UHMW plastic, Delrin, and many other materials will work as well as hardwood. The tool operations were defined using a .125 inch diameter straight bit, which you can see in action, cutting the arch in Figure 9. The resulting cut fresh off the CNC table is shown in Figure 10, which also show the holding tabs that need to be cut to release the part. After some light sanding around the edges to get rid of some "fuzzies," the caliper body fit into the wood pocket with a nice unforced press fit. Since the battery can be changed from the front, you can use double sided tape or even glue to hold it in place, but I didn't need to use anything - it's quite a good fit. Giving it a coat of polyurethane made it a bit more snug as well. I now keep it near my table saw, but it has been shown to be useful for many other tasks and given its modest cost, a very nice project. This project was written as an article for the Winter 2010 issue of Digital Machinst magazine. Visitor Map |
|||||||||||||||||