| Welcome to a...
|
|||||||||||||||||||
|
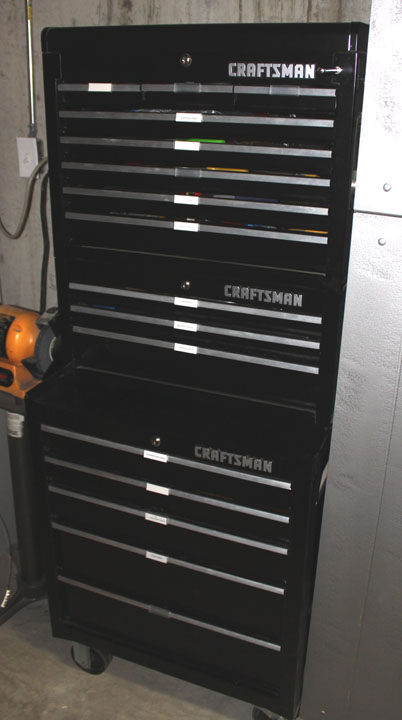
You know those multi drawer tool chests and cabinets that have a cart for the base and a chest of drawers that sits on top? They are usually made of bent sheet metal and have rolling casters. I've had a set from Sears for a long time, shown in Figure 1, but since I have both some woodworking and machinist tools, it is now stuffed to overflowing. I often have to fight with it to get the drawers closed, and that is not good. I kept putting off getting another, trolling for a good deal on Craigslist, hoping that a used one with nice ball bearing drawers would show up sometime, but it never did. I guess guys just tend to keep them around.
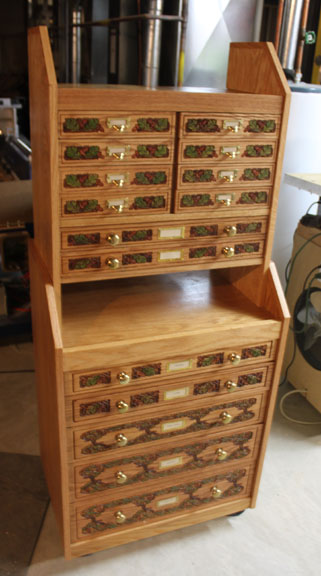
Rather than plunking down $600-$1500 or more for a set of decent ones (and I am not even close to the upper end Gerstner or Snap-On types), I began to toy with the idea of making my own. One with nice ball bearing full extension slides that close themselves when near the end. Lockable casters. Drawer liners. But if I was going to make one, it ought to reflect something I like. This is a build log of making such a tool cabinet, and how it came out is shown on the right in Figure 2. I've always enjoyed working with wood, and therefore have accumulated some woodworking tools over the years, both hand tools and power tools. I also like to use a metal mill and lathe, so I have tooling for those as well. Looking at my present tool chest, if I separated the machine type tools from the wood tools, it would be a fair split by volume, so I decided to build a tool chest for my woodworking tools - which meant it should have something to reflect a woodworker's style to it.
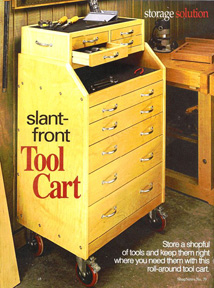
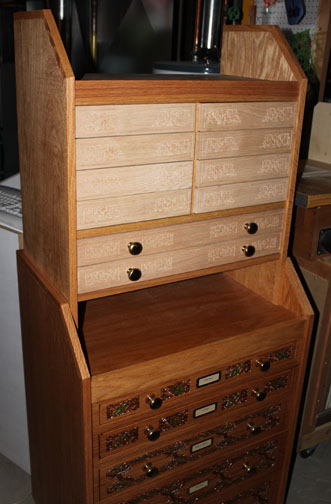
Fig. 3 After surfing for examples of that kind of thing, I hit upon a reference to a tool chest that was done in Shop Notes magazine, issue 79 a few years ago that was kind of what I was looking for. If you are interested in the plans for it, they are available from the Shop Notes website, but this design is pretty basic. Its just a 3/4 inch oak veneered plywood case with the top and bottom fitting into dados and tongue and groove drawers to fit the case width. The back of each cabinet is a 1/4 inch plywood sheet that lays on a rabbetted edge. I modified the design a bit, making slightly different dimensions and instead of the four drawer chest on top, I decided to make a larger chest as you will see. The set in Figure 1 has a little shelf between the upper and lower cabinets that I have found useful - I think it would be even more useful if there were an open shelf like there is in Figure 3, so I will keep that idea. While being able to lock up the cabinet can be important in some environments, drawer locks have just been in the way for me, so I won't be needing those. Once you have a CNC machine every flat open surface seems to beg for ornament. I knew that I wanted to make something custom-looking by carving a design into the drawer fronts. Since this was to be a cabinet for wood working tools, I originally thought of carving designs on the front depicting the tools in the drawers, but I quickly abandoned that idea since I move things around way too much. I began to think about what kind of style or look I really wanted. I love wood and trees, so I decided to go with an oak theme - the organic tooled leather designs by Al Stohlman came to mind with acorns, leaves, and vines decorating belts, saddles, and many other leather accoutrements. This is also known as the Sheridan style of carving. Some of Stohlman's tooled images were also dyed to produce a nice effect - maybe I'll try that here, too. Looking through a copy of Dover's 1500 Decorative Ornaments, I found something that looked close:
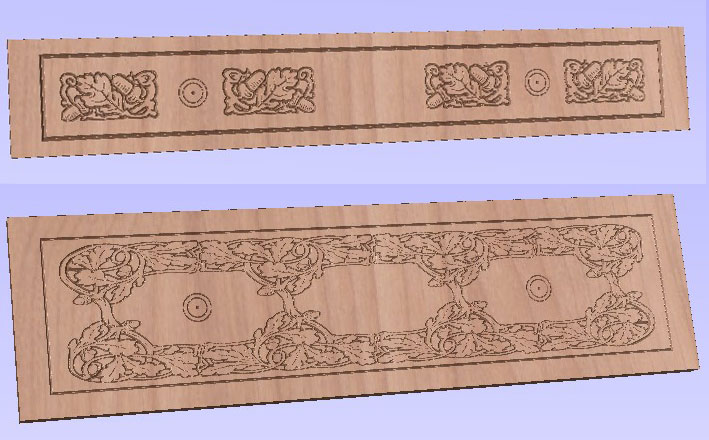
Fig. 4 These are very much like the Sheridan style, but I didn't like the way a single design looked, since simply enlarging and shrinking one to fit on all the drawers didn't look right. I settled on one design for the three larger drawers, and a smaller design for the rest. Both of these are from the Dover book, shown in Figure 4.
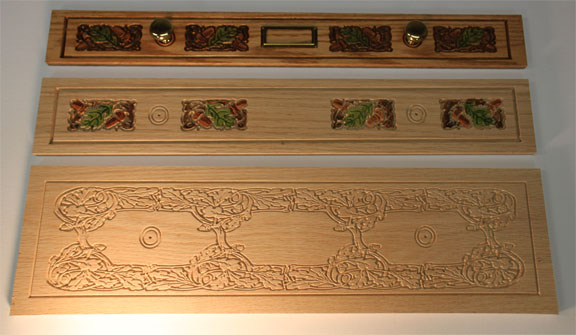
Fig. 5 As you can see in the above toolpath simulations, the right hand design in Figure 4 was replicated four times (and then two of them flipped) to make the small drawer fronts shown in the upper part of Figure 5. Also, the left design in Figure 4 was replicated, node edited, mirrored, and flipped to merge those parts into a single design for the large drawer front. Bottom drawers have ringed placements for the brass knobs (these were left over from a kitchen remodeling job - I have a hard time throwing things like that away!) and I left a place in the middle for a label card holder, like you used to see on the front of card catalog drawers in libraries. (I realize a lot of younger folks my not have any idea about what I just said, but there are some compensations for being an old folk!) I bought those here. I did the design work above in Vectric's Aspire, and from there generated the toolpaths to send to my homebuilt CNC machine.
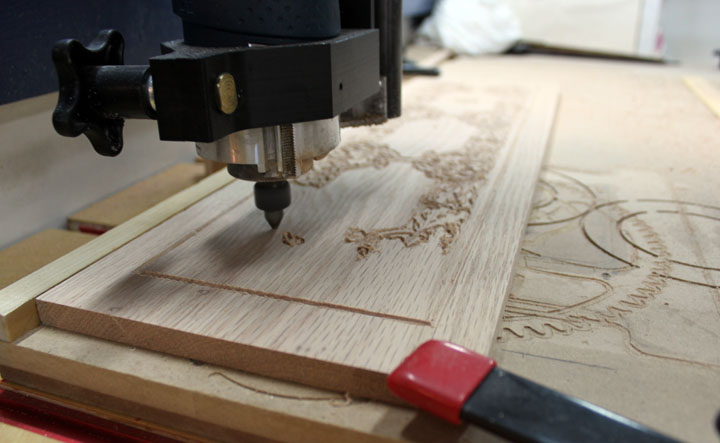
Fig. 6 Above shows a large bottom drawer front being carved into 1/2 inch thick oak using a 60 degree V-groove bit.
Fig. 7 Above shows the steps in finishing the drawer fronts. The bottom shows a large drawer, as it comes off the CNC table, then sanded and trimmed. The middle one shows the color applied - here, I just used some diluted acrylic paint in what painters call a "wash" using sap green, burnt umber, and burnt sienna. The top one has has a gel stain applied, and the knobs and card holder are resting in place so you can see what a finished drawer will look like.
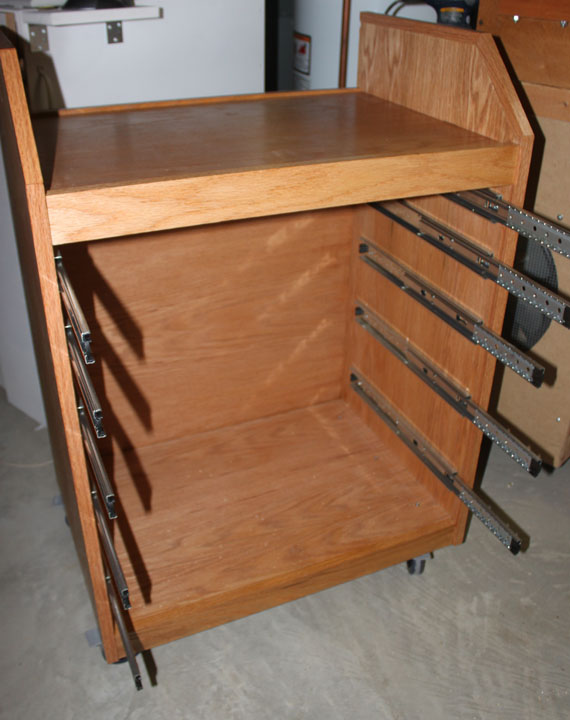
Fig. 8 Here is the case of the lower cabinet, ready for the drawers. It's 3/4 inch oak veneered plywood with solid oak trim to cover any exposed plywood edges, along with a 1/4 inch sheet for the back. I've installed some full extension, soft-closing ball bearing guides. You can find them fairly cheap on-line - I think I got mine from an ebay e-tailer for $4.40 a drawer. The casters are the lockable kind, as I didn't want the cabinet rolling around while trying to open or close the drawers.
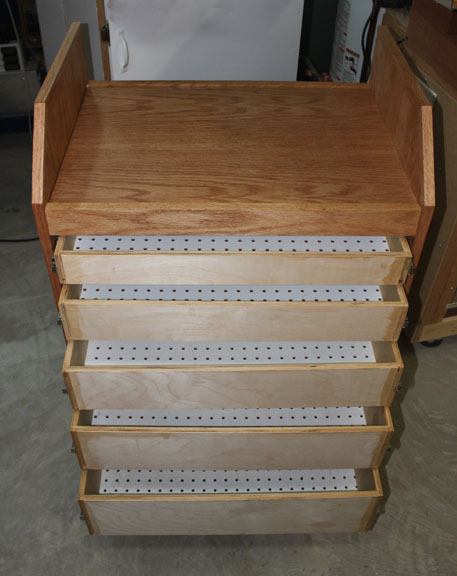
Fig. 9 Here the drawers are made and in place. The drawer size is the inside width of the case, minus the space needed for the two side mounted guides, and the other dimension is the depth of the case, minus the thickness of the drawer front, minus whatever setback you want for the drawers. I made each one one inch taller than the previous one, so the top drawer front height is 3 inches, the next one down is 4 inches, and so on. Since I am going to put in drawer liners, instead of buying a 1/4 inch hardboard sheet, I used some pegboard sheet I already had. The pegboard may also allow me to insert some moveable drawer divider walls using 1/4 dowel pins at a later date. The drawers have been polyurethaned except for the front - I haven't decided if I want to glue or screw the drawer fronts on yet.
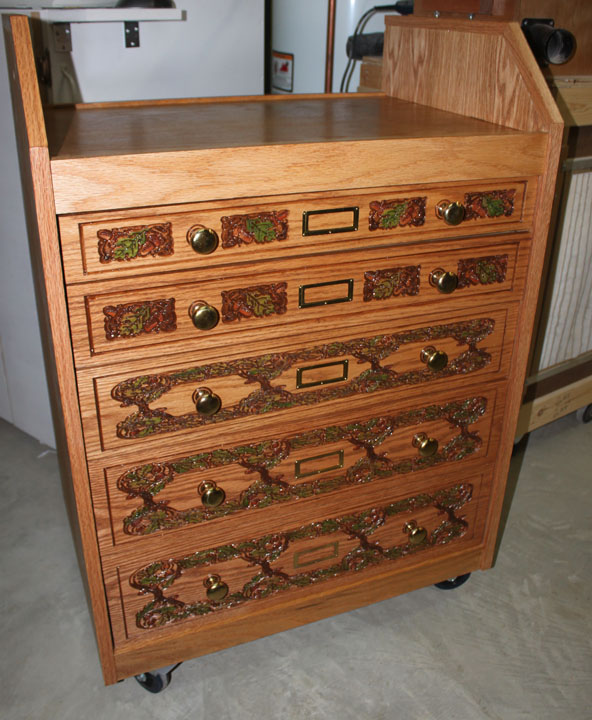
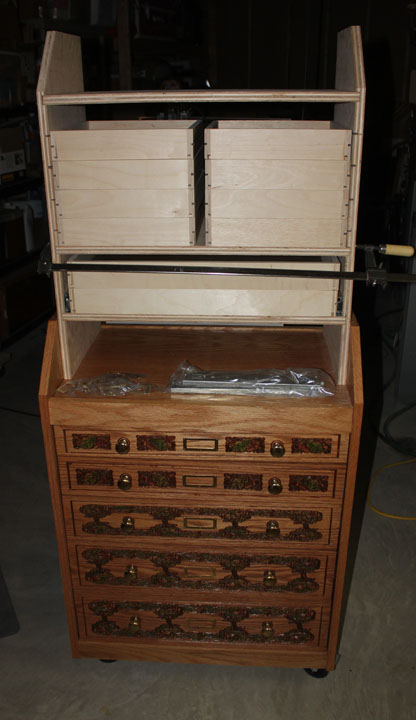
Fig. 10 Here is the bottom cabinet with the drawer fronts, ready for the drawer liner and tools. The camera flash imparts a bit of a shine, but it is actually a satin polyurethane finish that was used.
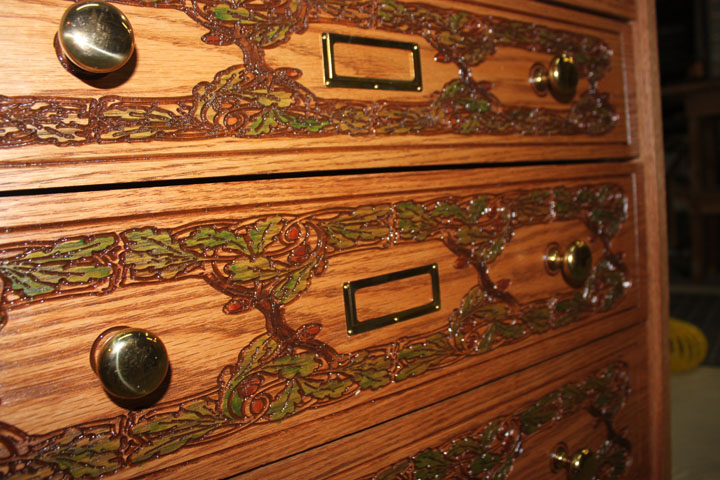
Fig. 11 Here is a closer look at the drawer front details. I think the color wash looks about right, providing a bit of color without loosing the wood grain effect.
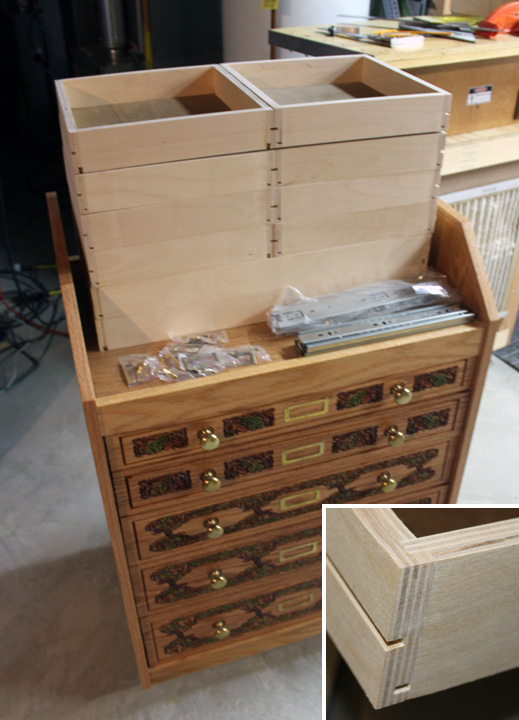
Fig. 12 Above are the upper drawers cut, glued, and sanded. I decided to have two more full width drawers on ball bearing guides on the bottom of the stack, and the rest of the drawers half width and will run on rails. You can see the rail slots in the corner detail of Figure 12. The slot for the drawer bottom was sawn all the way through, but this will be hidden by the carved front. Making the drawers is the bulk of the work! I will wait until the drawers are safely mounted in the upper cabinet before sizing the carved front pieces, so the next step is to make the upper cabinet. In front of the unfinished drawers above are the 2 pair of ball bearing guides for the lower two drawers, and the label card holders for the upper 10 drawers. They are different in that they have a pull built into the holder.
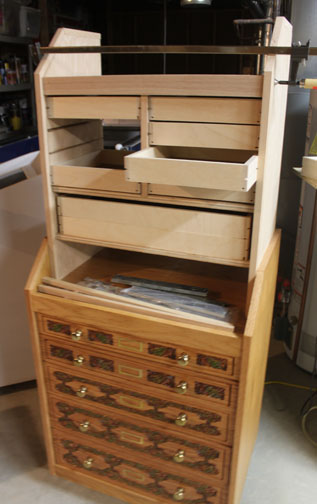
In Figure 13, the case for the upper cabinet is checked for fit before the middle upright is added and the whole part assembled. The bottom two full width drawers have the ball bearing glides, duplicating the upper two drawers of the bottom cabinet, and the upper half width drawers will move on simple 1/8 inch hardboard rails. Figure 14 shows the drawer runners in place, and some of the front trim pieces in place.
Figure 15 shows the upper drawer fronts carved and fitted to the drawers. I decided to modify the design used in the middle drawer front to work around the brass card holder/drawer pulls I decided to use on the upper drawer fronts. That design is shown at the very top of this website page. Figure 16 shows the colored and finished upper drawer fronts with labels in the card holders. I like having a kind of shelf between the upper and lower cabinets, as well as on top, as it seems some tools need a bit of assembly or fiddling to prepare them for a job, and these provide a place to do that. I think I will put down some cushioning type shelf liner on these shelves to help protect their surface. I think duplicating the bottom two drawers of the upper cabinet from the lower cabinet really helped to tie the two together. I used some tan colored paper to print some labels for the card holders.
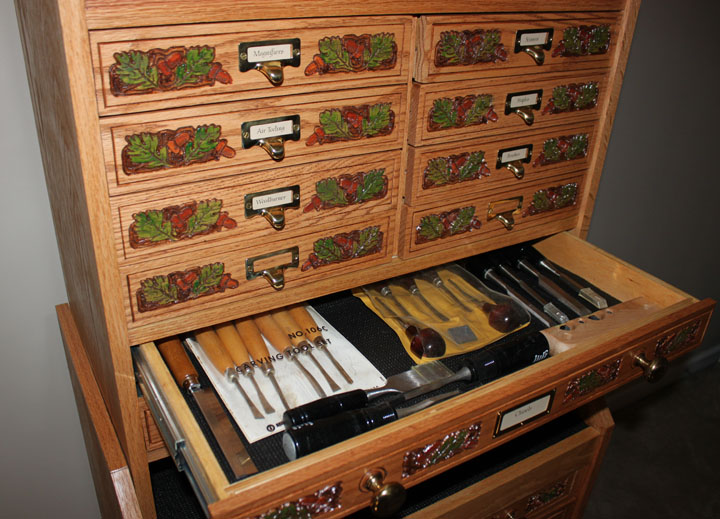
Fig. 17 Figure 17 is a close-up of the upper drawers. I don't know what the total cost came to, but having many materials on hand I spent less than $100 - I am sure it could be built out of newly purchased materials for under $160. In all, I found this to be a really satisfying project! This project was written as an article for Digital Machinst magazine in the Spring 2013 issue. Thanks for viewing this build log! Comments may be sent to gary at liming daught org. |
|||||||||||||||||||