

Center Console
The center console is not part of the kit, but ZAC doesn't mind the add-on. Here are a few of the parts I made for mine:
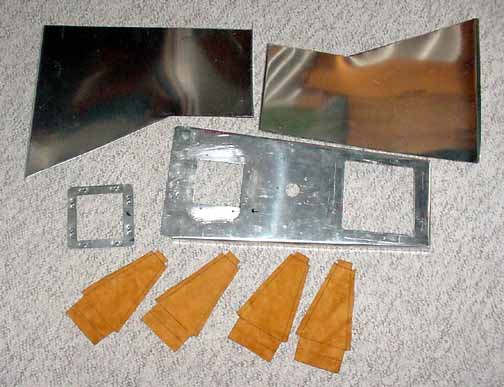
The side panels are on top, and for the fit I wanted, they are 400mm long, 187mm high aft, 315mm at the front, and the rise starts 150mm from the aft. There are also 20mm flanges on the aft and front edges not included in the above dimensions. There are standard "L"s cut to match the footprint along the bottom to attach the side panels to the floor of the cabin. I am going to leave the forward end of the console open unless the need for bracing there becomes apparent later on. Weight for sides was 7.8 ounces, and weight for the top was 7.1 ounces.
The console cover is 160mm at the front end, and 210mm at the aft end, and each side is 435mm long. These dimensions also do not include a 20mm flange on all four sides, although the aft flange is not bent, but will be riveted to the top of the seat. There is a 123mm square cut in the front for the gas gauge panel, and hole for the Andair fuel valve with mounting holes drilled, and a 80mm square cut out for the srick. Although it's still flat in the above picture, the cover will be bent to match the notch in the side panels.
Also, I wanted a leather boot for the stick, so I've made a lower mounting plate for the boot by cutting another 80mm square hole with 20mm sides, and added 8 countersunk nutplates to anchor it. This will be riveted to the bottom of the console cover, providing a place for the upper boot ring (not shown above) to be attached with screws. My boot is made of some soft deerskin pieces that will result in the boot being 135mm high, but they normally collapse some when installed. There are 6mm edges for sewing the deerskin, and two 20mm flaps along the bottom to glue all the way around the mounting plate.
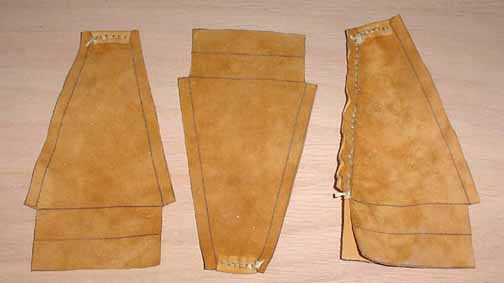
Here, I've saddle stitched the top edges using artificial sinew (waxed nylon), so that when they are joined, there will be a turned collar around the stick. I then saddle stitched two of the side pieces together. When all of the sides have been stitched, it will be treated with neatsfoot oil and turned inside out and slid up the stick. I really like the touch that the handstitched leather adds to the interior.
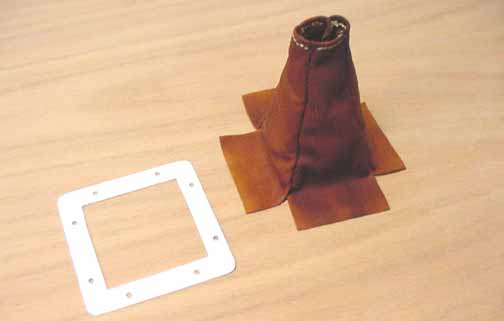
This is how the boot turned out, and I've powder coated the upper boot ring.
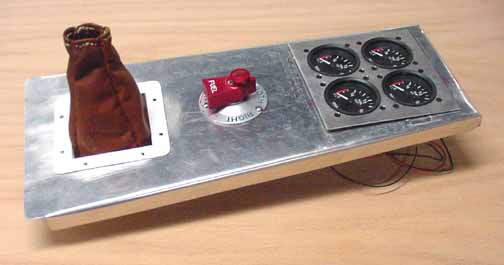
And here is the console top. Up to now, it was easier to work on flat, so now it gets a v bend to fit the console sides, and then it gets primed and mounted.
![]()
![]()
Images on this website are either Copyright Zenith Aircraft Company and used by permission or are copyright Gary Liming