

Nicopress Swaging
When you make up control cables, you want to make sure they aren't going to come apart. Ever. There is a long standing technique for doing this, outlined below. You make the end of a cable by wrapping it around a thimble, and then use a sleeve that is crushed around it to lock it in place. There is a specific tool for crushing the sleeve. The proprietary name for the the tool is a Nicopress. All of the cable on the 801 is 1/8 inch cable, so to start we first need to cut the cable.
Above, I think Tony Bingelis is right, the best way to cut the cable is to wrap the cable with masking tape and mark on it where the cut should be, and then just take a cold chisel and cut in half. This made very clean cuts.
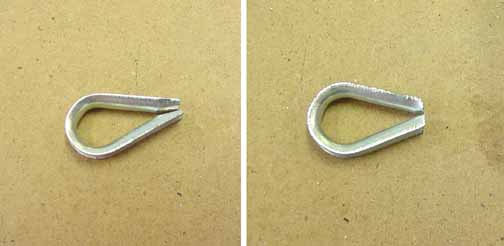
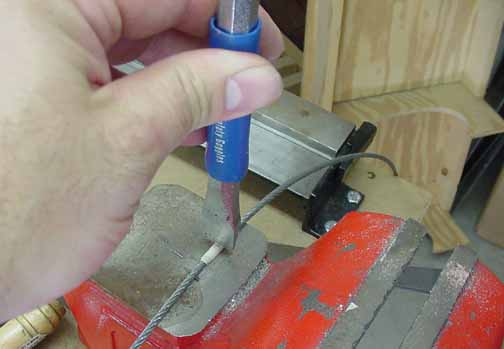
Next, I found it does help to trim off the tips of the thimble a bit, as shown on the right.
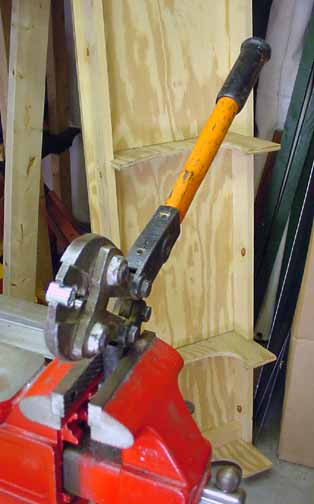
Then, beg or borrow a Nicopress tool, (hey, that's what joining an EAA chapter is for! The above is courtesy Bob Rockford, long time airplane builder) and put one of the arms in a vice. This frees up your hands to adjust the cable. Open the jaws of the press and place a sleeve in the proper position for the size you have, and center it in the jaws. Both thimbles and sleeves come in different sizes to match the cable diameter. Sleeves can be made of aluminum, copper, steel, etc. but the ones supplied are copper with a tin coating to keep down corrosion.
One thing I noticed while looking at GPS units - marine stores carry both the cable, thimbles, and sleeves. Also, the one I went to (West Marine) also had a station in the store with a Nicopress swage where you could make up a cable right there. If you find a friendly one, they might let you use it..
Next, before inserting the cable into the sleeve, do two things: slide any shrink tubing you are going to use on first, and then double check to make sure what this cable end is going to connect to. You may have to place that item inside the thimble loop before wrapping the cable around it. In the above example, the loop attaches to a shackle, which can be inserted into the thimble later. Other ends may need a turnbuckle already on the thimble before the cable goes on it.
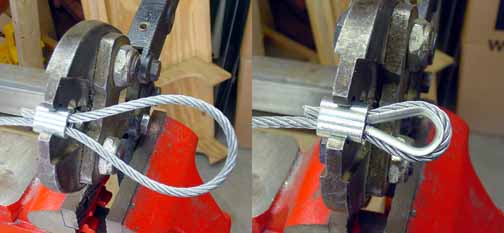
After checking those things, put the end of the cable through the sleeve and pull out about a foot or so. Then loop it around back into sleeve and insert a thimble. Take up the slack around the thimble, and make sure there is a bit of the cable protruding out of the other side, like above right.
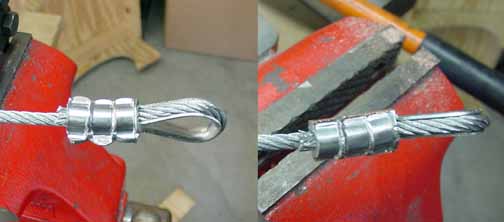
For these sleeves, there are three presses to be made. Do the middle one first, then the one nearest the thimble, and then the standing end. Make sure you have a bit of the end of the cable showing while doing the first press. If you have trouble, you can put a small vise grip on the end of the cable to hold it in place while keeping everything else in line. After pressing, some of the metal squashes out a bit, so I filed those edges smooth, as on the right.
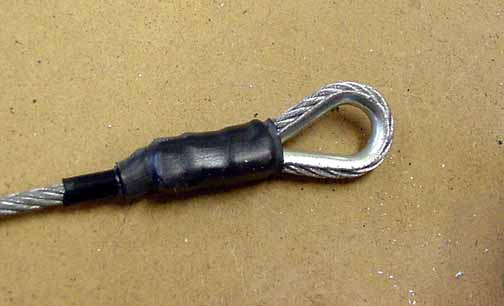
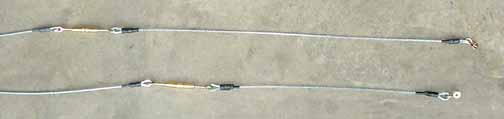
Then, I slid two pieces of shrink tubing onto the sleeve, and shrank it down. An example of a finished cable made up of these loops is below - these are my elevator cables with turnbuckles.
![]()
![]()
Images on this website are either Copyright Zenith Aircraft Company and used by permission or are copyright Gary Liming