|
Welcome to . . .
Page 2 |
||||||
| Home |
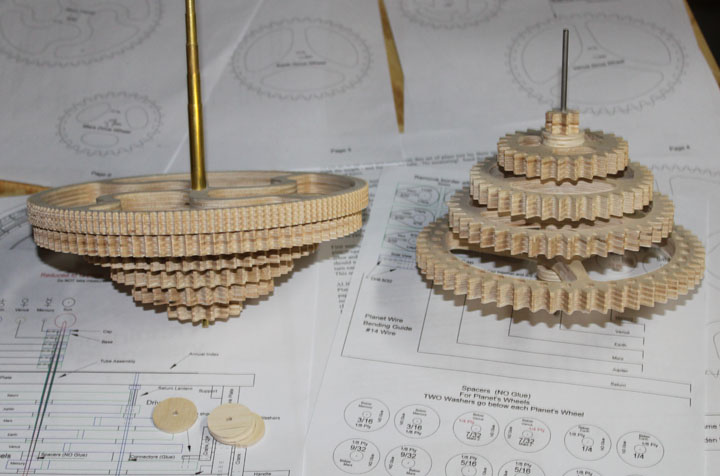
Fig. 9 The gears on the right have been placed on the 1/8 inch rod with spacers inserted between them. The gears on the left have had their appropriate sized tubing inserted in them, but have yet to have the spacers shown on the bottom applied. Soon they will mesh to affect the desired rotation of each tube, which will eventually move the planets in their paths. The gear ratios above are as close to the relative orbital periods of each planet as possible. Looking up the orbital periods for the Copernican planets (the first six, from Mercury to Saturn) we see the following, relative to earth's period being 1.
So, mercury's orbit period is .241 times earth's, and Saturn's is almost 12 times earth's. This also provides the ratio of the gear teeth for each planet, since in this design, one column of gears all turn on the same axis, and all the other gears turn independently. To make your own custom gears, you have to make some trade-offs involving the smallest and the largest gear you can or want to make. In this case, one revolution of the crank was decided to represent one earth season, so four turns of the crank will be one earth year, or one complete earth orbit around the sun. Even then, the difference is so great between Earth and Saturn orbital periods that Saturn's gear will be handled by a lantern gear type of arrangement, and that results in about the smallest gear teeth possible in plywood.
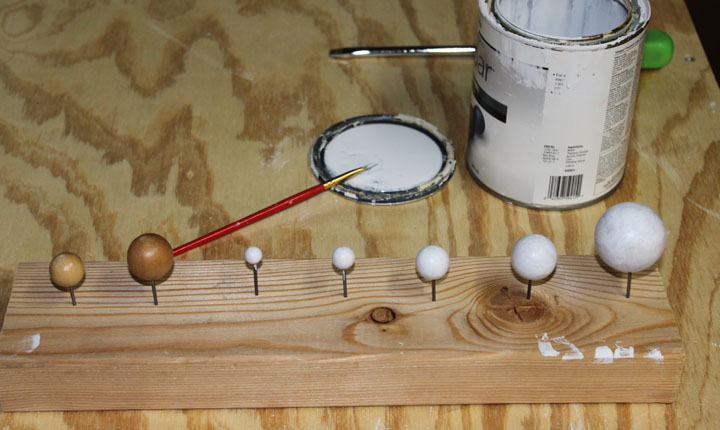
Fig. 10 Rather than attempt to turn wooden spheres on a lathe, I simply bought several sizes of these at a craft store. Above, they have already been drilled and placed on a board with finishing nails, and a coat of sanding sealer applied. I am just about done giving each one of them an undercoat of white enamel. Doing it this way makes me think I am going to need to do something different for the final painting, though. Above, from left to right are the Earth, Saturn, Mercury, Mars, Venus, Jupiter, and the Sun. These are not true to scale, of course - trying to fit them to their true relative sizes would result in ridiculously extreme spheres. For instance, about 1.3 million earths can fit inside the sun. Jupiter is 11.1 times larger than the Earth - a simplistic estimate (assuming perfectly spherical planets) would be to cube that, so about 1,368 earths could fit inside Jupiter. Using the largest ball above as the Sun, a truly scaled Mercury would be smaller than a grain of sand. Earth and Venus are about the same size, and I wanted Earth to be recognized easily, so they are larger than normal but still indicates some relative difference to their counterparts. I need to figure out something to do for Saturn's rings, the most recognizable feature of all the planets.
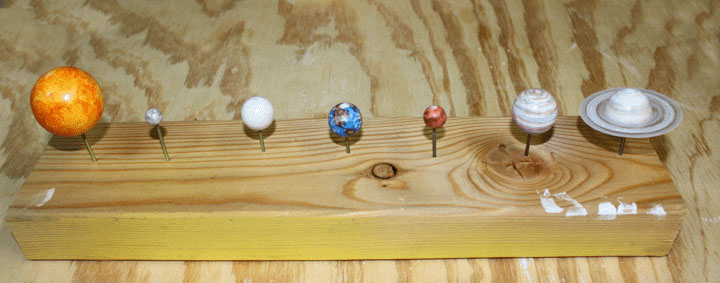
Fig. 11 Above, I have painted the planets enough to be recognizable, and placed in order of their position from the sun. I am not happy with the sun, but it is particularly hard to represent a ball of thermonuclear fire with just pigment. Mercury is a burned out cinder, and Venus is completely cloud covered in white. Jupiter has its Great Red Spot, and I found Saturn's rings in the garbage can - the tough, clear plastic stuff that comes wrapped around purchases that can only be removed with scissors. That and a bit of paint makes it very recognizable.
Fig. 12 Above are the support arms for each of the planets. Next, they need to be primed and painted.
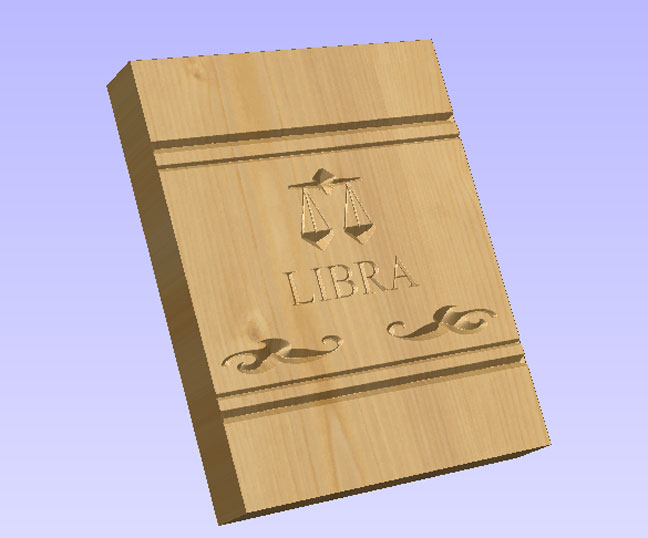
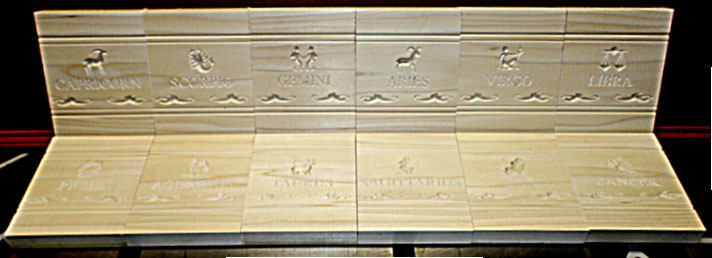
Fig. 13 Next is to start making a base like the 18th century versions. 12 sides, makes for 30 degree angles on panels with zodiac designs. Above is my first stab at such a design in VCarve. One for each constellation of the zodiac.
Fig. 14 Here are all twelve sides of the base. Once these are trimmed and glued into a twelve sided polygon, the top and bottom will be cut.
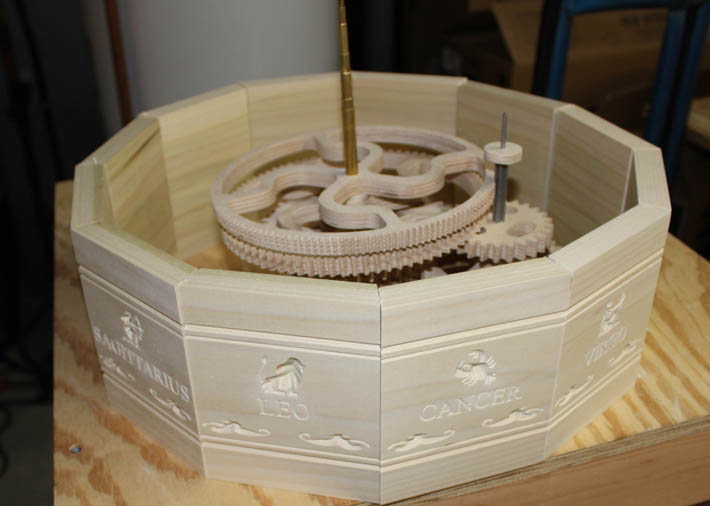
Fig. 15 Here, the sides have been cut to form a 30 degree angle, and have been placed standing next to each other. The gearing is put in the middle to check the fit, and you can begin to see what the final shape will be.
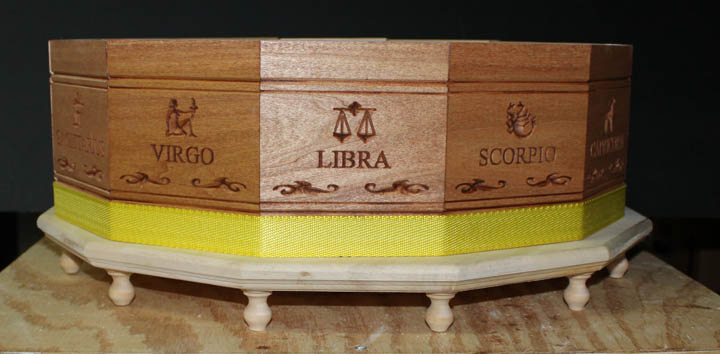
Fig.16 The sides have a coat of finish on them and the strap will hold them together when glued - I find that multiple piece glue-ups turn out better if the visible finish is on before they are glued. Also, the base has been cut, routed, and feet applied. |