

Flaps and Slats
Rode out to Mexico to pick up the wings and slats and flaps kit. Trip report here.
April 5, 2001
Both the flaps and slats come in two sections about 2.2 meters each for each wing, so they can be worked on in a smaller space. Before starting, it really helps to take a moment and mark on both ends of each section where it goes on the airplane. One should say "bottom, left, IB" (inboard) and the part number, and so on for all four. This helps making sense of the position of the brackets.
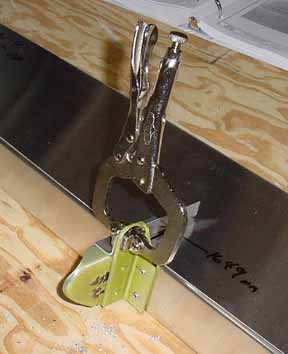
Here a clamp is used to hold a standard "L" against the flap support bracket so the nose rib can be positioned flush with the skin. Make sure the part of the flap support bracket that sticks out from the bottom of the skin is at least 25mm in order that there is enough bolt hole clearance when mounting these on the wings.
Here the nose skin is clecoed into place. Note the flush tack rivet behind the bracket that keeps the skins in place. After careful measuring, you do this eight times. The skins came pre-bent, and it felt likely that I would put a wrinkle in one if I opened it up enough to spray into it, so I am leaving the interior of the trailing edge flap skins without corrosion spray. For the same reason, it is nearly impossible to get behind the holes to do an adequate deburring, at least the way I've been doing it which is to run a board down the inside of the flap with the clecos out. You would think that somebody clever enough to think up a cleco would have come up with a tool to deburr the other side of a hole. I think I will ask the mailing list folks what they are doing.
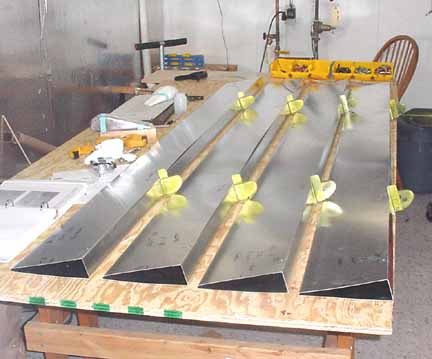
all four of the flap sections are ready for the nose skins, splice plates, and tips. The nose skins are pre-bent, which makes the next step a lot easier. Cut outs for the brackets are made, and the nose skins slip into place and are riveted. 6 hours.
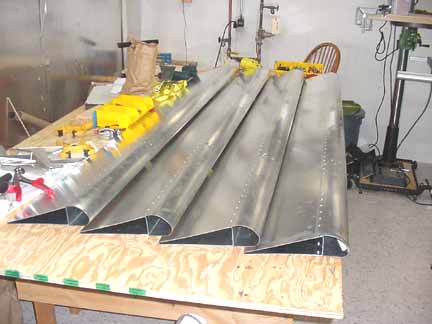
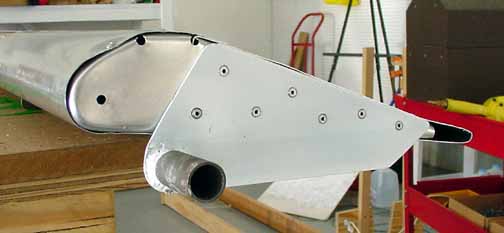
Here are the flaps with the nose skins riveted in place. 9 hours for this step, but it went well.
April 15, 2001
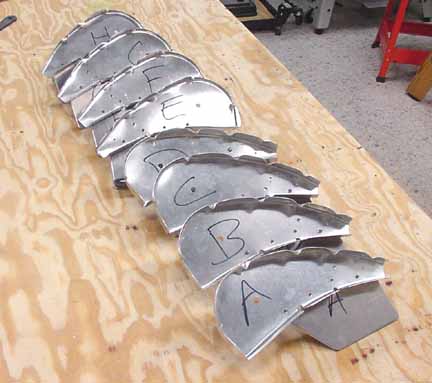
Arrrgh! I was inspecting my rivet lines while I had the flaps standing up side by side, and something didn't look quite symmetric. After measuring, I discovered that one of the hinge brackets was mounted exactly 20 mm off of where it should be! Since they must line up with the flap arms on the wing, this is a real problem. I have no idea how it happened, I can't believe I did it, even now. I don't think there is any way I can drill out 128 rivets without ruining a trailing edge piece, and new nose skin will definitely be required. I will call ZAC Monday to see how much replacement pieces will cost.
April 18, 2001
I suspected this step was going way too smoothly. "Measure twice, cut (rivet, drill, etc.) once" is very true. Bought the replacement pieces and made a new one fairly quickly. Mosr hassle than effort.
Jump to August, 2003
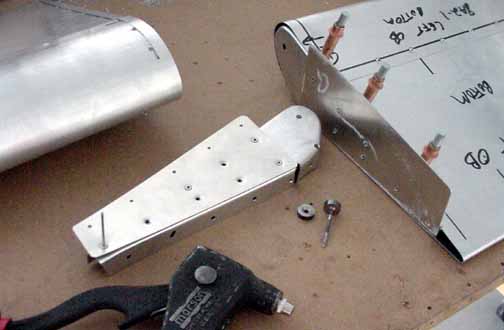
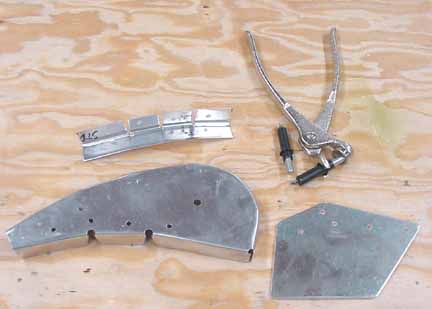
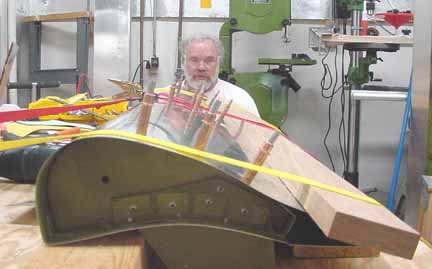
Here the splice pieces are being attached to the end caps. Flush rivets will be good here, so each hole is dimpled with a dimple die (shown in the picture above the hand riveter) which makes an indentation on the two pieces to be riveted. A flat (non domed) head is put in the hand riveter, and a flat face results.
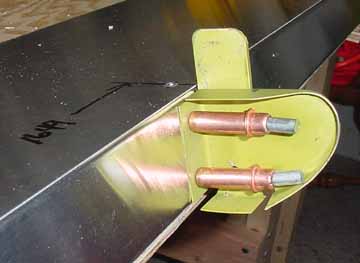
Here, the outside arm of the Friby-Haas No Slot Flap mechanism has been powder coated and is also flush riveted in place on the inboard end cap. The tube pointing toward you goes into the side of the fuselage into another arm.
Here, the pivot point for the flaps on the side of the fuselage is determined by shining a point laser through all the holes of the flap support arms, which puts the pivot point right on the money.
Back to April 18, 2001
Constructed the slat jig for the next step - all supports and rails were cut at the same time, so they all line up - about 4 hours:
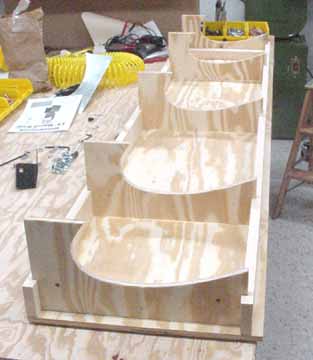
Checked the slat jig template against the fiberglass tips - they line up pretty well.
I will finish the last flap and then onto the slats.
April 28, 2001
Finished the flap skins and drilled and cleco'd the end ribs on the flap centers. Can't do the root or tip ends until they are mounted on the wing, so I need to make a jig so that they can be stored until final assembly. 4 hours for that.
April 29, 2001
Cut 8 pieces of standard 'L' to make some attached flanges for the slat ribs. The Jilson cutting tool was perfect for that, making an 1/8 inch slot right up to the L wall. In the manual, it shows the spacing for the slots in the "L" as 35-30-30-45. You need to make 4 this way, not all 8. The other 4 are reversed, or 45-30-30-35.
Here are all 8 of the slat ribs with the attached supports and "L" cleco'd together. Now to deburr them and prime. About 3 hours for the 8 slat ribs.
May 6, 2001
Here are the four sections of the slats with the ribs and nose stiffeners in place, standing on end - on the left are the two I/B sections with the root end upright. They are kind of nested together so it is hard to see them as separate pieces in this photo. On the right are the two longer O/B sections with the wing tip upright. Now they are waiting to be wrapped together and joined. 13 hours for this step.
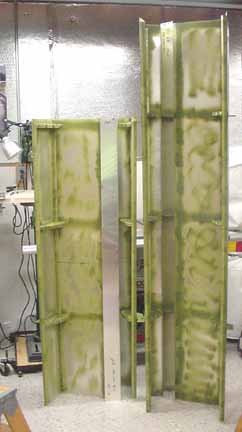
Since the revised manual says it is best to wrap them as they will be joined (I/B slides into the O/B), and since how deeply they slide into one another is dependant on the slat support distances taken from the completed wing, I will wrap the I/B sections but wait until the wings are closed to wrap and rivet the O/B sections.
Here the left I/B skin has been wrapped around the top, making sure the edges are still true and flat while drilling and fastening clecos.
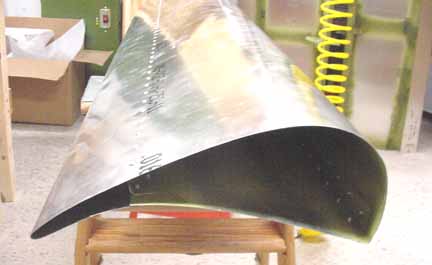
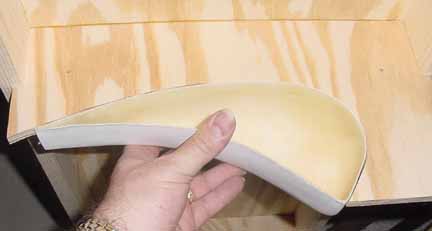
This is how the finished curve turned out, and
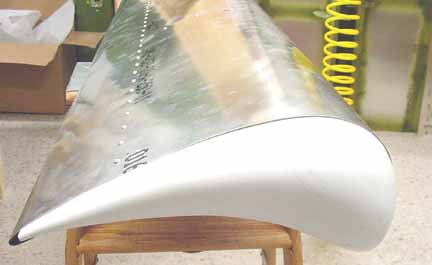
this is the fit of the fiberglass tips resting inside the skin. It will be drilled and riveted on final assembly. I hope all those fingerprints will clean up ok! At this point, I have 4 flap segment, two per wing (as in the photo above) and 4 slat segments like the one above, 2 per wing. The segment for each wing will be joined when the wing is complete so the brackets on the flaps and slats can be fitted to the wing brackets. 6 hours to wrap and rivet the slat sections.
Jump to September, 2003
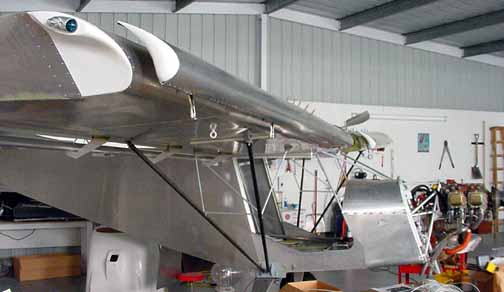
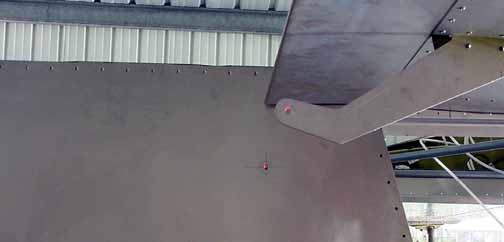
Here, the two left sections have been joined, the outboard end trimmed off, and the whole slat assembly has been clamped to the wing in place. I cut some wood spacers to set the aft gap of the slat, and will use them to set the flap in place for final drilling.
![]()
![]()
Images on this website are either Copyright Zenith Aircraft Company and used by permission or are copyright Gary Liming