

Wings
Wing kit arrives, but is stored. Construction awaits garage availability and completion of Flaps and Slats.
May 23, 2001
First part of the wings is to prepare the ribs with extra flanges.
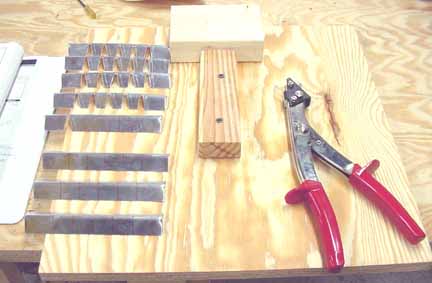
The flanges are cut from standard L pieces, and the Jilson tool works great for this, allowing a slot to be nibbled right up to the wall of the L without drilling holes. The wooden jig is to keep the rib and flange aligned properly when drilling.
After trying it, I modified the jig a bit and carved a slot in the wood for the bottom of the clecos to ride in as the rib is rotated and drilled. Below, all 8 of the nose ribs that have the flanges and slat support brackets are drilled, deburred, rounded, and filed. 4 hours to prepare the jig and 8 nose ribs.
May 27, 2001
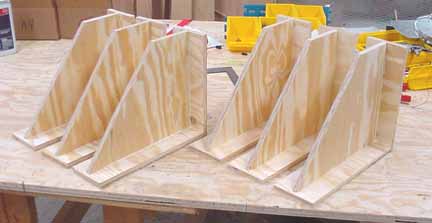
The directions call for three jigs to hold the spars at a 90 degree angle while attaching the ribs, but some of the other builders have said you need more than that, so I built six, took me about 2 hours.
June 8, 2001
Snapped a taught chalk line down the table, and screwed the jigs onto the table along that line and started positioning the spar and ribs:
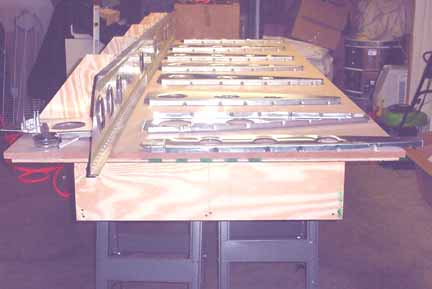
Drilled and deburred the matching flap brackets for all eight ribs that have them (4 on each wing) 1 hr. Ribs for the left wing are put away.
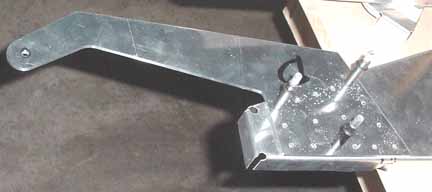
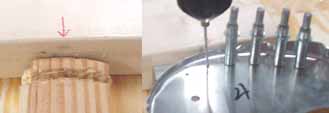
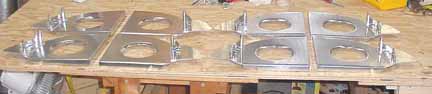
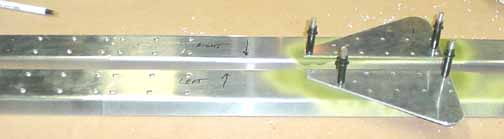
Drilled, deburred, primed, and riveted the splice plates for the rear channel spars for both wings, shown below on left. Also, drilled, deburred, and primed the strut bracket for both rear channel spars, shown below on right. Put the left rear channel spar up in storage. 4 hours. The arrows below point to the top of the channel, which will point down to the table top since the wing is initially assembled upside down. Next, attach the ribs to the spar.
June 9, 2001
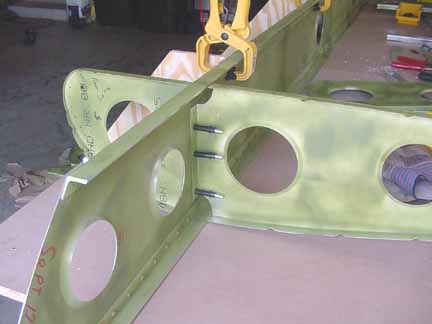
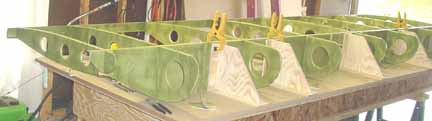
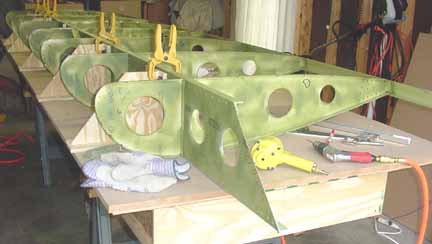
Each nose rib is clamped in position on the spar, drilled, deburred, and removed. Then each main rib is clamped, drilled, deburred, and removed so that the nose rib and the main rib can be clecoed together at the same rib location, as shown below.
Then, the rear spar is clamped, drilled, deburred, and clecoed. When all this is done (9 hours) it looks like this, all primed and ready to rivet together:
Here it is, the wing skeleton riveted together and ready for skins! 2 hours. This part of assembly is done with the wing upside down. This step goes quickly, but really feels like a lot of progress has been made - I really felt like I was working on a plane!
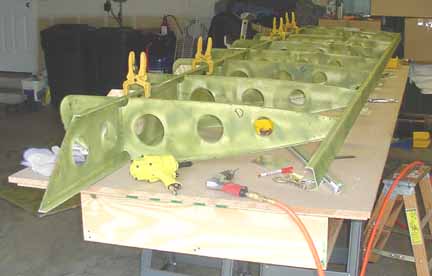
From the front edge, the end nearest you is the wingtip where the strobes will go.
June 17, 2001
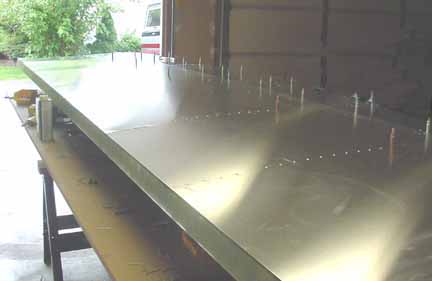
On top of the skeleton, the skins are placed. Below, shot from the root end, the bottom rear skins are drilled, deburred, primed, and riveted, and the nose skins are drilled and clecoed. 8 hours.
Continue to 2nd Page Jump to 3rd Page Jump to 4th page
![]()
![]()
Images on this website are either Copyright Zenith Aircraft Company and used by permission or are copyright Gary Liming