|
Welcome To A ...
|
|
|
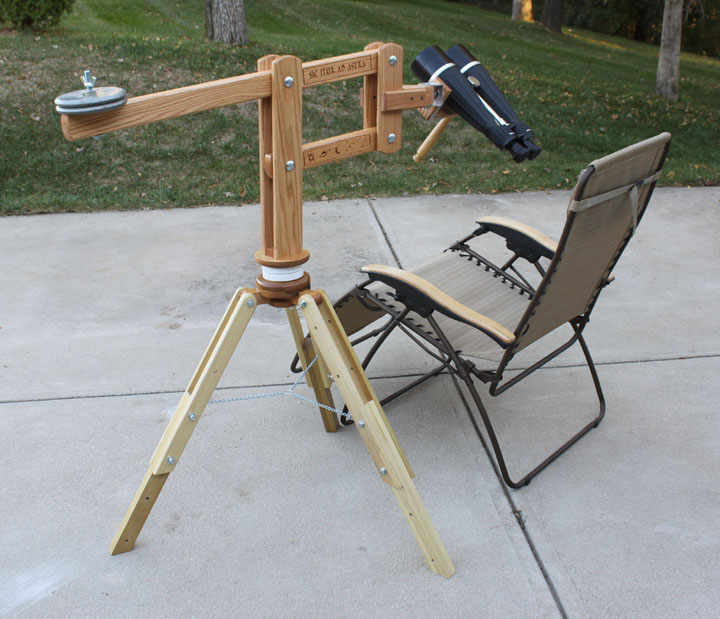
Fig. 1 This is a picture of my binochair after it was completed. The rest of this website is a log of how it was built, and some commentary on using it. At this writing, I've just spent a very pleasant evening with it, and it works great! The large binoculars can positioned in any direction, and they stay put at the position you leave them. You can cover about 1/5 of the sky before needing to move the chair, so you only have to move the chair 5 times for a complete sweep of the heavens. Introduction This webpage is about making a device to make practical and comfortable use of large binoculars. By "large" I mean the ones I have in mind are 25 x 100 power weighing 10.3 pounds. Although that may not sound like much, it's enough to have the following disadvantages:
Simply stated, they never were meant to be used by just holding them with your arms. They do come with a way to place them on top of a standard camera tripod, but those tripods have the problem of being either affordable and rather flimsy, or quite expensive for something sturdy enough to hold these. Even if you do get a high quality tripod, they have three drawbacks:
A common solution among stargazers is to mount a parallelogram type balance beam on a tripod, and implement as many degrees of freedom movements as necessary to be able to easily position the binoculars in any orientation and have them counter balanced. There are many examples of something like this on the net, and I spent some time looking at them. The design goals of my device are:
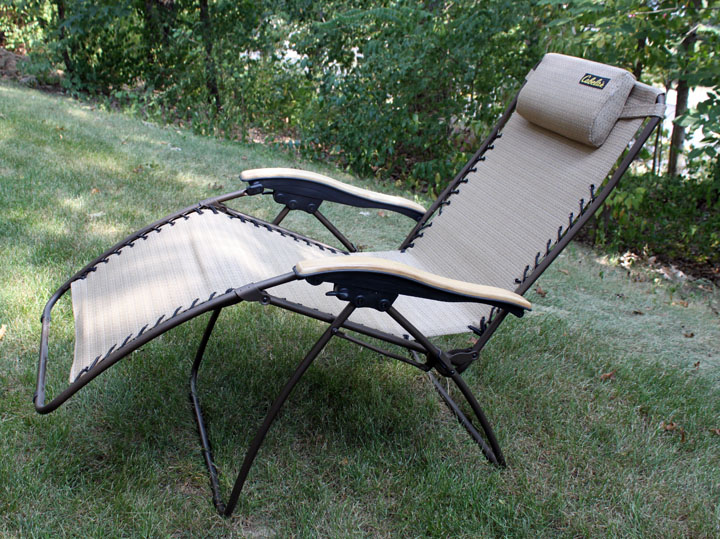
The actual chair I would like to use, at least to start, is a "zero g" chair I got on sale at Cabela's, shown below. It has the advantages of being very comfortable, it is quite easy to lean forward or back with just a slight leg movement, it is fairly portable and lightweight, and best - I already have one! (They also have a padded version, as well as a double seat version that would be great for showing the stars to others.)
After looking around the web on various astronomy forums and email groups, I saw pictures of one that I thought would make a good start by Dennis Simmons of Australia. (Thanks, Dennis!) At least initially, I will start with his design until we get to the binocular mount itself. This device has three main parts, the bottom tripod that provides the azimuth pivot, the parallelogram arm that supports the main up and down weight, and the binocular mount that provides swivel for the binoculars. Accordingly, along the left of this page are the menu selections for the tripod, parallelogram, and mount portions of this build. BTW, if you want to see any of the photos on this website in a larger format, you can. If you are using Firefox or Internet Explorer, right-click on the photo and select "view image..." If you are using Chrome, right-click on it and "open image in new tab..." Thanks for looking! Comments mat be addressed to gary at liming daught org. Visitor Map |
 BUILD LOG