

Fuselage - 9th Page
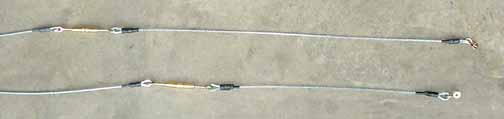
Made up the cables that go from the pedals to the rudder, and from the elevator bell crank to the elevator, which are shown above. On each end of a cable section is a nicopress fitting. A how-to for the nicopress is on this page. The right hand side has a shackle at the end - a shackle is never torqued tight by a bolt - a castle nut or clevis bolt should be used to allow the shackle to move freely. In the middle are turnbuckles, which will be tightened and safety wired on installation. These turnbuckles will be positioned just above the access door under the fuselage.
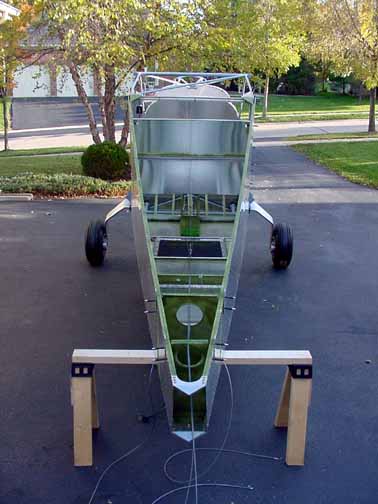
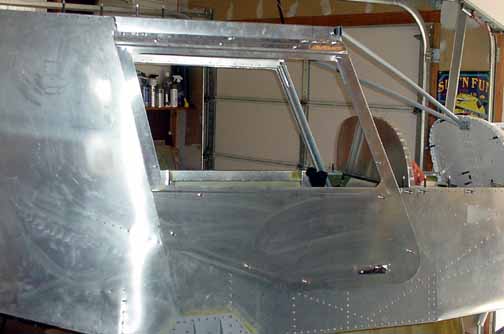
Above is the fuselage wheeled out onto the driveway and the tail pulled down on a sawhorse for better access to the interior. It really pays to not rivet the top of the fuselage until the last so that you can get to the cables, hard to reach rivets, etc up until the end of the project. The cables have been strung and are just resting out the end, waiting for the tail assembly.
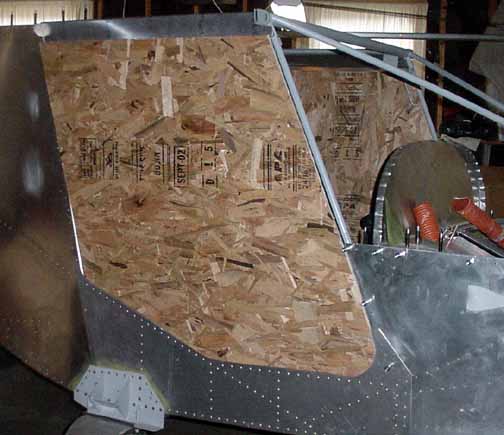
Time to do the doors. Start the doors by making sure you've read through all the instructions, especially the errata sheet, as usual, and then hang the door sill. This involves trimming the edge pieces away from the cabin frame tubes as shown in the picture below. Make the forward end fit perfectly by sneaking up on a good fit, and then cut the aft angle.

Note that the upper part of the sill over laps the top connector plate that joins the cabin frame with the rear fuselage, so it must be drilled to match the holes in the plate.
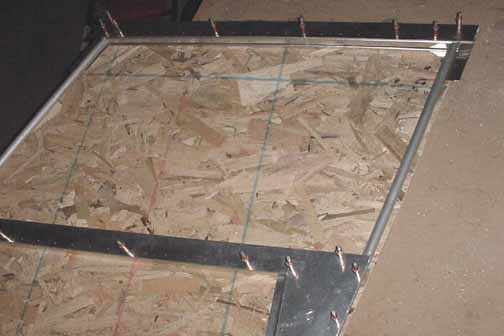
Once the sill is in place, you need to hold a piece of plywood over the door opening so that the door opening can be traced onto the outline. You can hold the plywood up just under the wing attach points, and it must clear the strut/landing gear assembly on the bottom. In order to do this, the plywood should be about 39 by a full 48 inches wide. It should also be flat in order to get a good trace. I found nearly all of the 3/8 plywood at my home improvement warehouse to be warped, and I thought 3/4 material to be too cumbersome, so I used some of this 3/8 pressed chipboard:
After cutting it out and making sure it has a good fit, I marked it "right side" and "inside" and "outside", and then did the left door template the same way.
 .
.
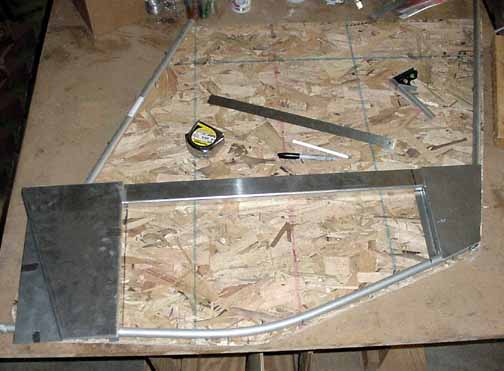
Here, the right side door template with the inside surface facing up has the tubing placed on it, the 6 mm reference line drawn around the bottom and sides, and the finishing nails driven along that line to hold the tubing in place. Once you place and fit the rear gusset (the sheet on the right) you measure 650mm between the inside of that to a line perpendicular to cross channel. Aligning the front gusset with this line tells you where to place and trim the front gusset, and where to trim the front edge tubing.
The two top channels are trimmed to size and drilled and clecoed, completing the inside frame. The manual describes a 1/4 inch margin all around the frame, but does not take that into account when measuring the cutting lines for the top channel. Adding this back in makes a good fit. The inside of the frame is then primed and riveted.
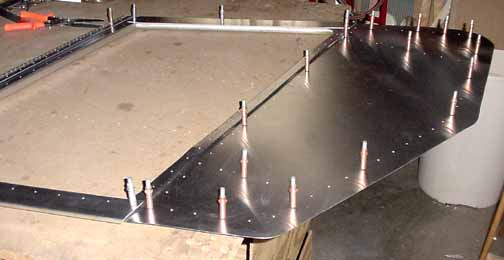
Here, the door frame has been flipped over and the bottom skin cut to fit per the manual. Also, the side panels that will cover the edge of the windows is in place, and everything is drilled and clecoed.
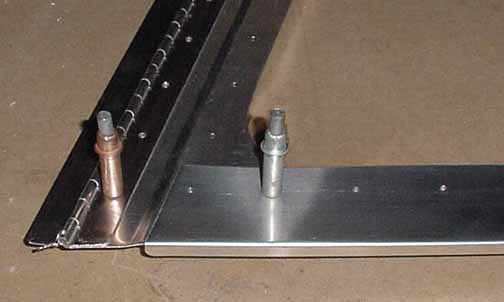
Here is a closeup of how the frame overlaps the top door edge, and the door hinge has also been drilled and clecoed in place. The ends of the hinges have had the hinge wire shortened slightly with 1/16 inch holes drilled in the ends and safety wired to prevent the door hinge from going anywhere. Only the inside of the door is riveted at this point.
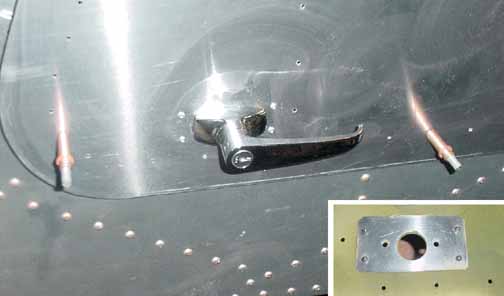
The new handles are not the ones shown in the manual that have a nylon spacer - the new ones just attach to the outer skin with two small machine screws. The handles are substantial, and I thought a bit heavy to just attach to .025 with a couple of screws, so I added a doubler plate behind the handle, shown in the insert. Extra weight for the two plates = 4 tenths of an ounce, hardly worth mentioning. Also, I've powder coated the inner door latch. The picture below was taken during a trial fit of the door, just before final riveting. Since the screws that attach the handle will be covered by riveted skin, I will apply threadlocker to the screws before riveting.
And here are the finished doors, just cleco'd by the hinges in place for now. Also, the outer skin is just cleco'd in place because I've been warned not to cut or drill the lexan window material while its cold, so I will wait for a nice warm day.
![]()
![]()
Images on this website are either Copyright Zenith Aircraft Company and used by permission or are copyright Gary Liming