|
 Vision |
| Home Page |
This page describes giving the android vision.
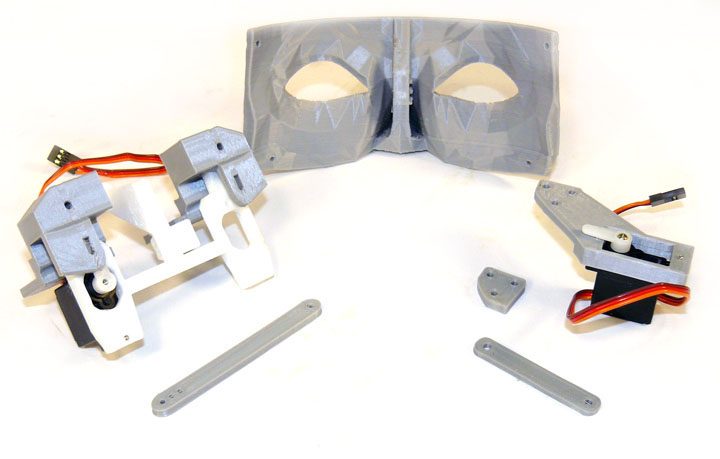
Fig. 1 Above shows the parts for the nominal eye movement mechanism. On the left is the white frame to support the camera holders (the gray pieces fitted on the frame) that lets the eyes move left and right. If you elect to slave the left-right motion of the eyes together (as opposed to being able to move them independently so you can have cross-eyed looks or do a "Marty Feldman") you only need one servo and a tie bar, as shown on the left. The fixture on the right has an identical servo that controls the up down movement of both eyes and is mounted at the bridge of the nose on the mask. Both servos are DS929HV's, and the front of the gray holders will have cameras mounted on them.
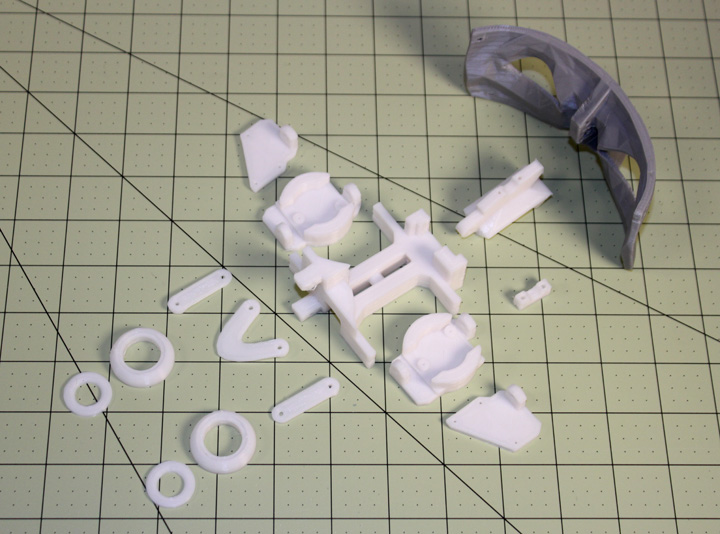
Fig. 2 In one of his blogs, Gael said earlier that he was not very satisfied with the way his eye mechanism mounted to the eyeglass piece, so he took the re-designed variations by Mats Önnerby and Bob Houston, and adapted them to use the original DS929HV servos, and still provide a wide range of motion for the eyeballs. This design uses the original eyeglass piece and is now the new nominal design. Isn't open source collaboration an awesome thing? However, I am beginning to wonder if we need a better nomenclature for the filenames to reflect the part versions - just putting V2 or V3 behind things doesn't seem to help much. Anyway, above are parts for the revised revised eye mechanism as it exists now. The grey face piece ("EyeGlass") is the original design part to which all the new parts are are attached. Thanks to Mats, Bob, and Gael for this work.
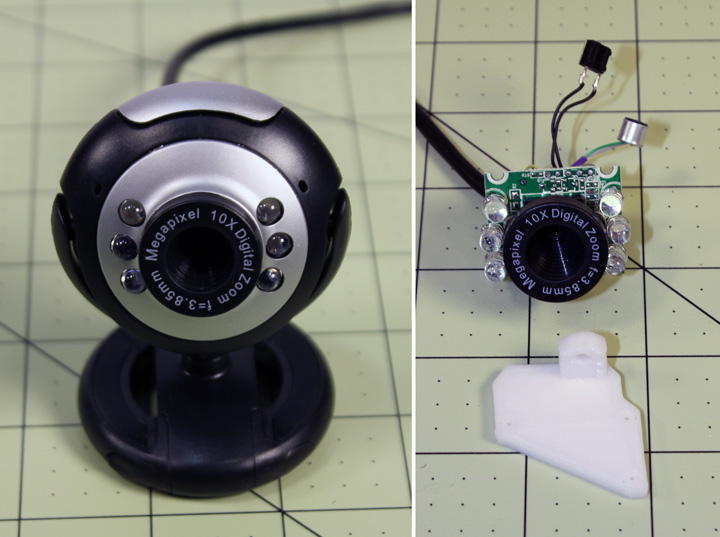
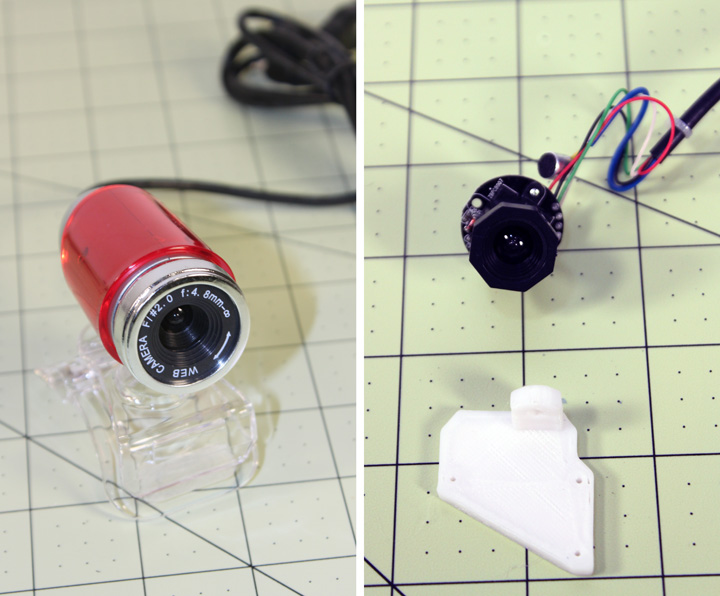
Fig. 3 Which camera? Gael used a Hercules Twist webcam for his eyes, but I haven't been able to easily source them here in the U.S - most of the vendors say its not available anymore. I think having two cameras will be needed soon because of the convergence of the VR headsets using your phone display and head tracking (here I mean moving the robot's head with yours, not moving to stay locked in on an object) so getting them cheap enough is at least part of the picture. I decided to try a cheap webcam (USB 2.0 interface) to see if it might work, although I am of course skeptical of the quality. At $4.20 per camera, (I got them from BangGood) I figure I can always use them as dummies at that price. It is advertised as a 12 megapixel camera, but that spec is often misleading in that software is needed to "enhance" the picture to that resolution, especially when they don't name the camera's video resolution in the description. It describes the cam chip as a 1.3 megapixel CMOS, which usually indicates a resulting 640x480 resolution 30 fps video, and that is indeed what you get. It does have a manually adjustable focus lens over the cam chip that has M12x.5 threads. The FOV is pretty narrow, but with those somewhat standard threads, it will fit a replacement wide angle lens like this one with a 115 degree FOV for $3.41. Good, clear picture with nice color. Above shows the webcam product on the left and what it looks like inside on the right. The illumination LEDs can simply be removed for use on the InMoov - I don't think there is room for night vision LEDs inside the eyeball. The black object on top is a small button that controls the LEDs and which can be removed, and the silver cylinder next to it is the microphone, which can also be removed. The camera mount shown in Figure 2 is shown under it, showing that it would be easy to mount. The PC board is 25x30mm. The black lens piece (iris) has a diameter of 22.4mm, a bit large for the nominal eyeball openings shown in Figure 2. I'll play with it a bit more, but I'll probably try a few others as well.
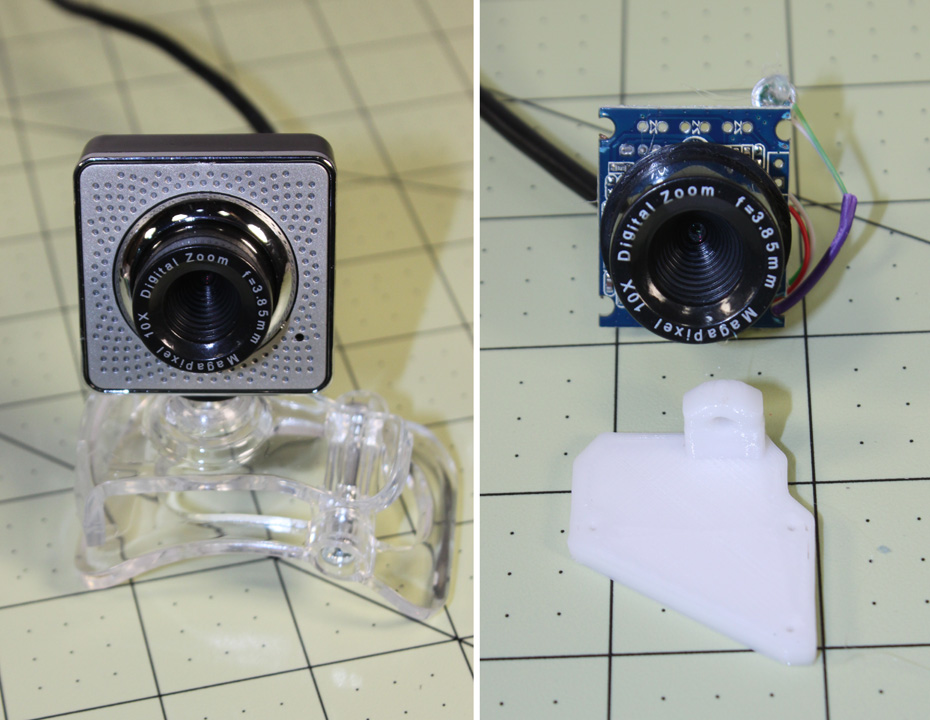
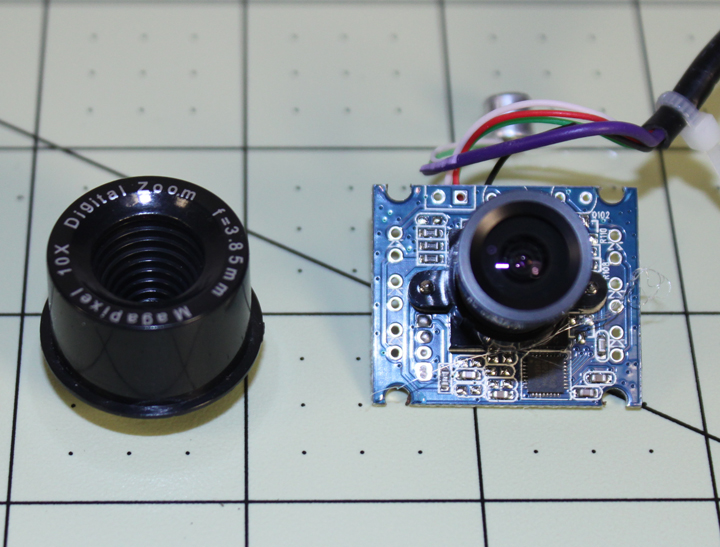
Fig. 4 Here is another one from BangGood, this one was $6.59 and advertised as a 30 megapixel. It is, however, a good ole VGA type (640x480) cam at 30 fps. Typical graininess in low light conditions, but not as bad as some. It has a lens housing that has a threaded focus capability, and that works pretty well. The FOV is also pretty narrow, but uses the same M12 threads as above, so cheap replacement lenses are available as well. The description claims there is no built-in microphone, but it sure looks like one is attached - perhaps it just doesn't work on this model - I didn't test it because I won't be using it anyway. It looks like the cam will mount easily on the printed platform - in fact, I think it is exactly the same PC board as the one in Figure 3 without the LEDs added - it is 25x30mm as well. The iris diameter is 21.85mm and the distance from the front of the lens housing to the back of the pc board is 23.25mm. The color on this camera is not as good as on the one above, as it seems a bit washed out.
Fig. 5 Here (search Item# N82E16826717012) is one that is $4.99 from Newegg. It is advertised to be 1280x960 at 30 fps, but what I found was 640x480 with washed out color like that of the cam in Figure 4. I am not sure what fps it is capable of, but it's frame rate is less than the two above. Also, the material quality and workmanship is a lot less than either of the two above. The outside iris is a removable lens housing and when removed leaves the lens shown above right. The largest circumference of the octagon is 18.34 mm, and the distance from the front of the lens housing while in focus to the rear of the PC board is 24.26 mm. This lens is closer, but less than, the FOV of human perception (roughly 120 degrees) - something like 115 degrees or so. This lens is the "standard" 12mm thread, so it could be used on any of the above cameras. This PC board would be harder to mount than the other two. Overall, this is not a good camera to use, but for the money, you could almost buy it just for the lens and pitch the camera.
Fig. 6 Above shows the cam in Figure 4 with the $3.50 115 degree FOV lens I mentioned before. Next to it is the lens that came with the camera. This not only gives a wider view, but provides a smaller pupil size (14.1mm) that will allow a more realistic iris and eyeball effect.
Fig. 7 Above is a Logitech C270 webcam I got on a Ebay auction pretty cheap, and I now see that some retail places are now selling them for $20-$25. They are a true 1280x720, but the video is kind of jerky at that resolution - it doesn't get reasonably smooth until you drop it down to 800x600, but the images are quite good. Its cheap enough, and clearly does much better imaging than the previous cams, but the printed circuit board shown on the right is about 28x55mm so it would be very difficult to get into the mounting area provided by eye mechanism and still allow both degrees of freedom. Also, the 60 degree FOV lens is glued in place - I saw where some sites showing how to hack this camera got lucky by forcing the lens loose to change focus, (it is "in focus" for 40cm and beyond, nothing closer) but I don't see replacement lenses available for it. It is smaller than the 12mm thread of the other cameras.
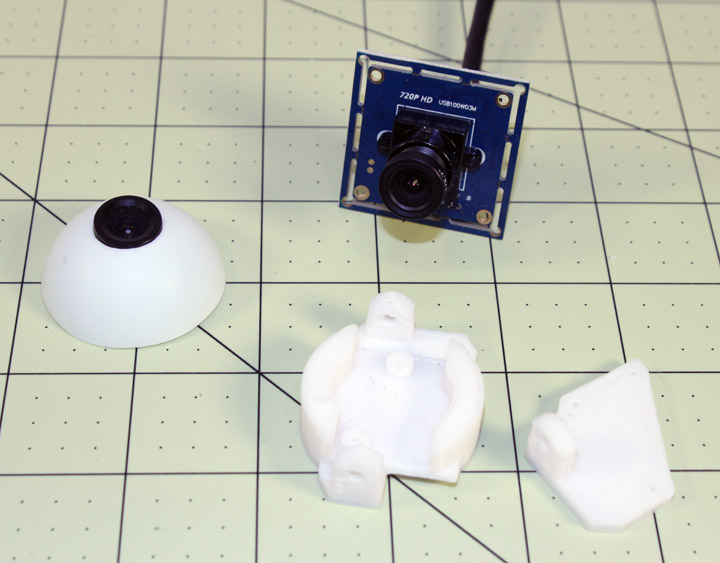
Fig. 7 I ordered this $30 camera and it is a 720p, 30fps camera with a replaceable 92 degree FOV lens that matches the other lens geometry described above, shown with the eyeball on the left. 92 degrees should be good enough, and it has a good form factor (32x32mm should fit) and is advertised as OS compatible with the usual suspects. Worked out of the box on both Windows 10 and 7 for me. Good quality picture. I don't know why there is a break-away frame along the outside edge of the PC board, but it is just extra material. Very small mounting holes, oddly a 3/32 inch, or 2.38 mm hole, but it could be reamed to 3mm easily. I think this one will work out just fine, and it arrived in less than two weeks.
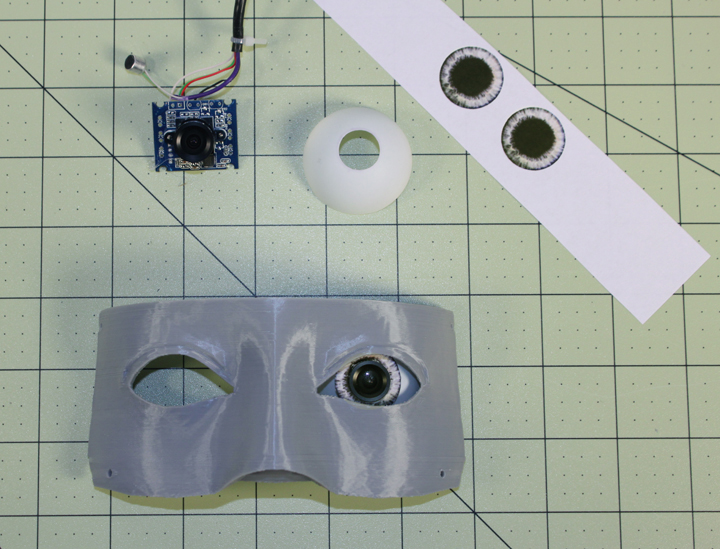
Fig. 8 I saw where one of the builders (sorry, I don't remember now who it was) used a ping pong ball as the eyeball, so given that it is light, thin, and easy to machine, I though I'd start with that. I wanted to see what a more realistic iris around the lens would look like. I sliced the ping pong ball in half by carefully rolling it into a fine toothed bandsaw, and just used a Dremel grinder bit to slowly cut the opening for the lens to a press fit size. On the web I searched for images of an eye iris, found one that was mostly grey, enlarged the pupil area for the lens, and sized the image to fit the 14mm lens opening. I printed the irises on just regular copy paper and cut them out with a sharp hobby knife, and took a look at what resulted in the above photo. I may be falling into the uncanny valley here, but I think I'll live with it a while to see if I like it. I like the way the lens catches a reflected highlight, like a real eye. I might spray the whole eyeball with the iris in place (without the lens, of course) with some glossy clear coat to give it a wet look as well. Fig. 9 After getting the pieces in Figure 2 together, it seems like the interpupillary distance is not apart far enough. In other words, the pupil in Figure 8 is too close to the nose. Sure enough, another builder, Alan Timm noticed this and put up some variations on Gael's V2 design, given here. Comments may be directed to gary at liming daught org. Thanks for viewing this build log! |