|
|
||||||
| Home |
Spindle Upgrade
Fig. A Well, it's time to upgrade the table to a new way of cutting. After going through several of the venerable Bosch Colt routers, shown in Figure A, I decided to take a different track. Even with the SuperPID controller that I added to it, the router was just too darn noisy. It was so bad I found I needed to wait until my wife went out shopping before I could cut anything, although mind you, it was seldom a long wait. Many of my projects were requiring multi-hour job durations as well. Also, I am pretty sure that I snapped a few bits due to lack of slower speeds, though. The main problem with the SuperPID is that you have to mod the router when it needs replacing, which usually happens at the worst possible time. I had a lot of hours on the present Colt so I suspected I would need a new one soon. Mostly because of the noise issue, though, I decided to go the route of those Chinese spindles. I let it be known my SuperPID was available, and sold it after a brief but heartfelt salute.
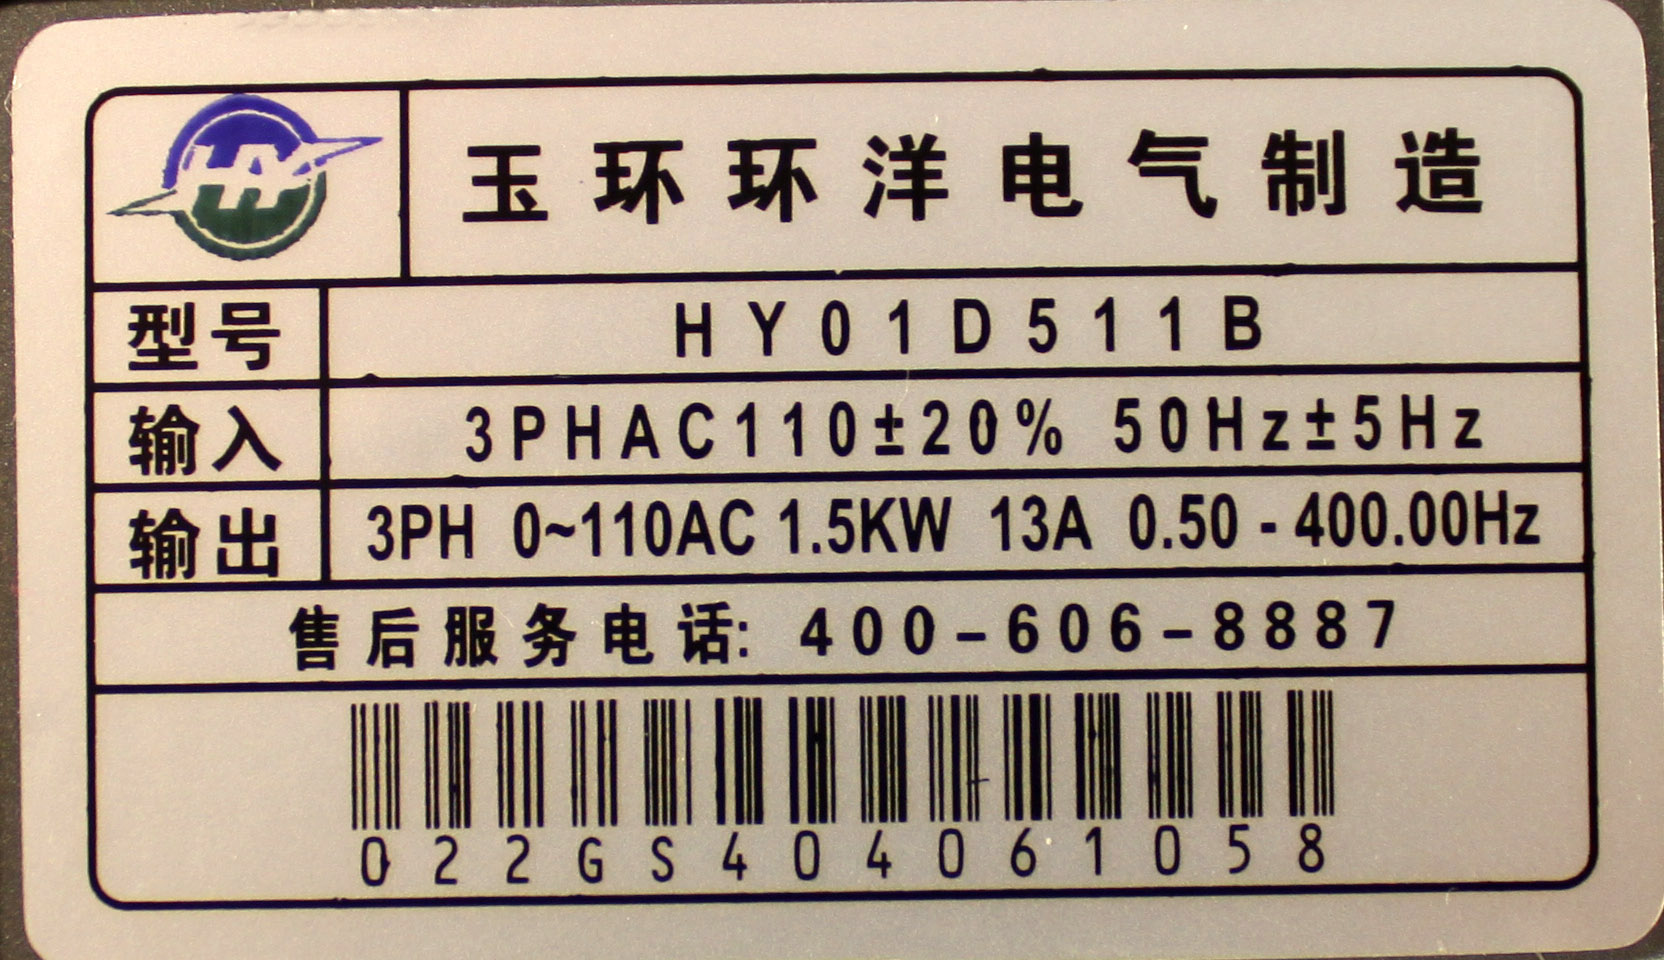
Fig. B This is the Huanyang (HY) 1.5KW spindle and VFD package I bought. Since the Colt was 1 horsepower, and 1 horsepower is (roughly, in this case) .746 kilowatts, this motor should be about twice as powerful as what I have been using. It works quite a bit differently, though. This VFD uses 110VAC although most of them at a higher power want 220VAC. It does allow for computer control of the VFD (i.e., being able to specify spindle speed in the g-code) as well as being able to add a remote potentiometer for speed control, but the first step is to make it work stand-alone and from there we'll see about more automatic operations. The other big difference, and this is why it is so much more quiet in operation, is that it does not have a noisy high speed fan, but is water cooled - you have to circulate water through it to keep its bearings cool, which is what those two compression fittings are sticking out the back of the spindle. Also, and this will be the hard part, the spindle is 80mm in diameter, so I will need a new mount for it.
Fig. C I usually start with the hard part, but let's do the easy part first - the plumbing. Shown above are the main parts. Upper right is a $17 Harbor Freight fountain pump that has a head of 4 and a half feet. I've read of guys using aquarium pumps for this, but I don't think they will pump as high as that. It came with a bunch of plastic fittings, two of which are on the lower right. These need a 1/2 inch ID plastic hose (shown just above the black plastic fittings - find somebody that sells it by the foot since you only need a few inches) with a hose camp to go on the left plastic fitting. The other end slides onto the threaded part of the brass fitting shown in the center of Figure C, also secured with a hose clamp. The brass fitting is a 3/16 hose barb with a 1/4 MIP thread (Lowe's, $2.78) that fits the clear 1/2 hose. The spindle itself has fittings on the end that wants a 3/16 ID by 5/16 OD hose. Since I plan on routing the hose through the e-chain on the table, I went with the soft vinyl hose that is very flexible. It came in a coil of 20 feet - I hope that will be enough to do a round trip from the spindle to the bucket via my echain. Everything above including the pump was just under $25.
Fig. C All that's left is a reservoir for the cooling fluid, which in this case will just be water. I will start with a 5 gal container - $4 with lid for one that matches my table. Holes will be drilled in the lid for the water line going to the pump, the return line, and the power cord. I will figure something out to anchor the return line to the bottom of the bucket. Hopefully, there is a place on the VFD to drive a relay to turn on the pump when the spindle is turning. (Note - this is not coolant, which I gather is a term reserved for bathing the material in a fluid to carry away heat while machining. Therfore, its a cooling pump, not a coolant pump.)
Fig. D Above is the basic wiring for the VFD, shown with the bottom cover off. The screw terminals for the motor came with a sticker over them to help identify them. (I gather there have been some who applied 110 or even 220 across these and let out the magic smoke.) The U, V, W, and ground wires go to the motor unit's terminals shown on the right, but before plugging in the motor, the unit needs to have power and be programmed first. For this unit, we just apply good ole 110VAC to the R, T, and ground positions on the bottom row of screw terminals. The upper two rows of screw terminals provide access to other functions of the unit, and I believe the FA, FB and FC or DCM/DRV terminals provide some access to the spindle being on or off. I need to do some investigation. The bottom of the unit provides grommets for the wires, the lower oval shaped one is for the power and motor wires, and the round one is for the upper strip low voltage wires. The diagram on the right is the wiring for the motor wires on the spindle.
Boy the Chinese have trouble writing manuals - I assume the ones they do in their own language are much better. The cover of the manual for the inverter looks like a professional design, until you go to actually use it. Anyway, time to be specific. If you have the same Huanyang VFD/spindle combo with the data on them as shown above, you're in luck and can use the following programming. Otherwise, some of these values will be different, especially if you have a set for 220VAC. My spindle is 110V, 1.5 KW, 5amps, 400 Hz, 24000 rpm. Here are the programming steps I am using to get the spindle to operate stand-alone: First - set PD013=8 to reset to factory settings. This will set all brazillion parameters to a known value. Then, set PD001 = 0 (later, a 1 for external (Mach3) control) PD002 = 0 (or, later, a 1 for remote potentiomter speed control) PD003 = 400 PD004 = 400 PD005 = 400 PD007 = 20 PD008 =110 PD009 = 15 PD010 = 8 PD011 = 120 PD014 = 12 PD015 = 12 PD072 = 400 PD141 = 110 PD142 = 5.0 PD143 = 2 PD144 = 3000 and this VFD should be good to go. Then, you can plug in the motor and try it out with the spindle controllable from the VFD's panel. Once that is accomplished, you can either run a remote pot to control the speed, or control it with Mach3 g-codes by changing the first two lines. Using the DRV/DCM lines should control a solid state relay directly to turn on and off the cooling pump.
Fig. G Ok, due to time constraints I wimped out and just bought a 80mm mount off ebay (with shipping, $67.35) for the spindle, shown above. I still need to make an adapter plate that allows this mount to stick out past the rails, but that will be easy. Fig. H |
||||||