|
|
|
|
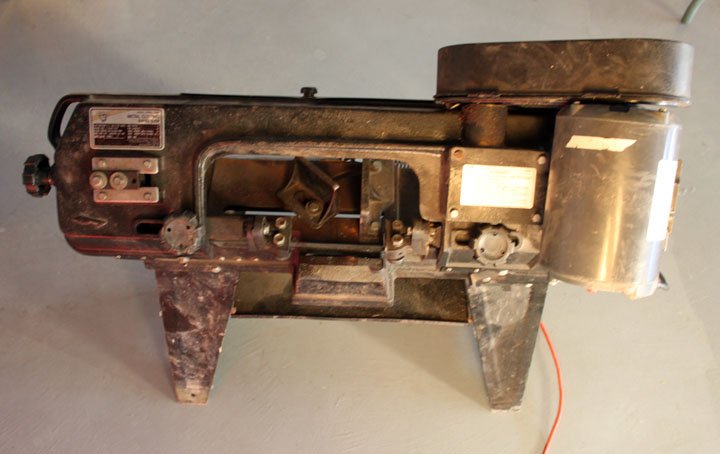
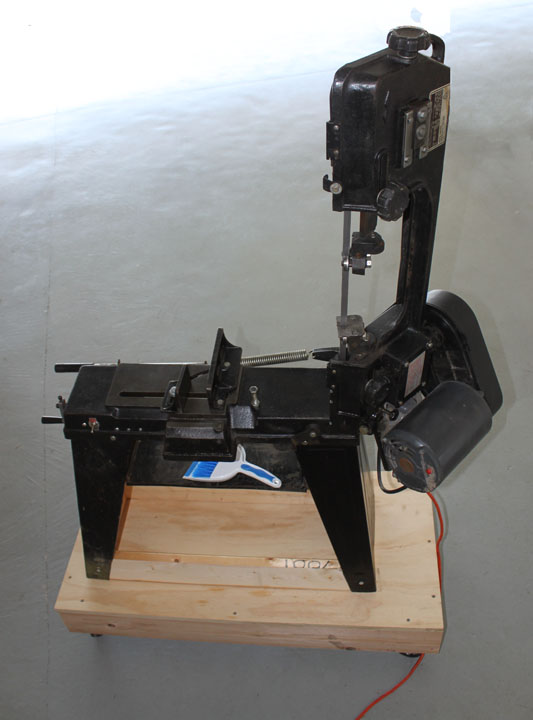
Fig. 1 January, 2012. Above shows a Craigslist $50 "rescue" bandsaw - a 4x6 metal cutting bandsaw that should make a nice addition to the mill. Sure beats the heck out of a hacksaw! The above unit has seen a lot of action and rust and needs some love, and is missing the work stop attachment, but even as it stands, it cuts metal. The original motor has been replaced with a Sears Craftsman 1/2 hp motor, which is probably a good thing, and the bearings all seemed OK.
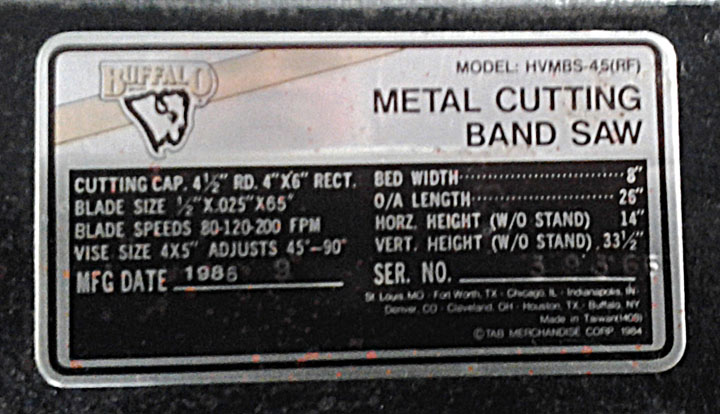
Fig. 2 Above is the data plate - it's a 1985 vintage Buffalo HVMBS-45(RF). I am pretty sure the RF means it was made by Rong Fu since they made these bandsaws at that time, and it says "Made in Taiwan" on it. In all other respects, it is virtually identical to the Harbor Freight, Grizzly, Enco, etc. low end models of this bandsaw, so whatever mods or tooling I might make for this could also be used for one of those as a replacement, should this one decide to die on my watch.I saw that the motor had a slow startup, so my first thought was to look for a capacitor start, but there isn't any on this motor. Then I saw that these saws very slowly push down on a toggle switch, making the contacts close in such a way to invite the kind of arcing that destroys the contacts in them. I replaced the switch with a 20amp rated one from my local electronics purveyor for $3 and it now starts up pretty snappy, except when its cold, but that's due to the heavy oil in the gearbox. The stand for the saw is just some stamped sheet metal, which can work well if the design is good, but its design allows the saw to tip over much too easily. This is especially true in its upright position, which is definitely a mode in which I want to be able to operate the saw. Plus, I really like to have all my floor tools on wheels.
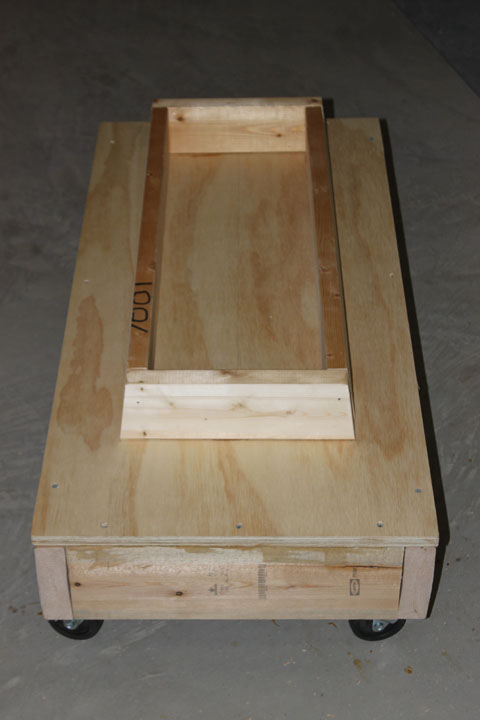
Fig. 3 Here is my idea of better stand: a piece of 20x40 inch plywood with some trimmed 2x4s screwed and glued onto it. The sides of the stand were measured to be 5 degrees off of vertical on the ends, and 8 degrees off of vertical along the sides, so I cut the 2x4s down to match. I then added a skirt of 2x6 lumber around the bottom to give it a little more height. Also, I had a coupon to buy one of those small Harbor Freight moving dollies for $7.99, which is the cheapest way I know of to get 4 three inch ball bearing casters to go under the base. I had all the lumber on hand, but its about $7 for the dimensional lumber and less than a 2x4 sheet of plywood, so say $15 for the base.
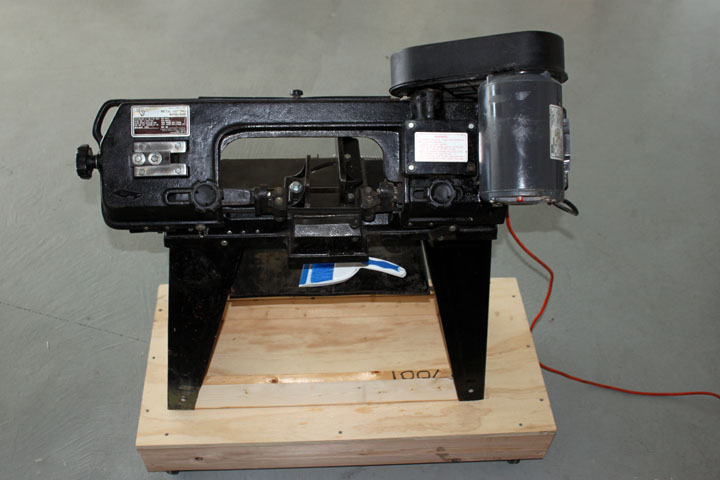
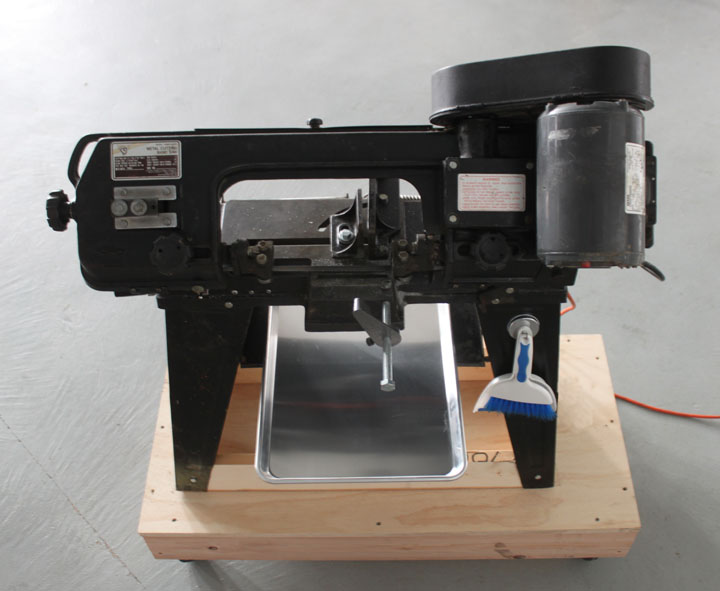
Fig. 4 Here the saw has been cleaned up, the blade guards adjusted, the oil changed in the gear box (what a nasty, gritty job that was - there was still foundry casting sand in it!), the power switch replaced, a $1 brush and dustpan added (the white and blue thing on the shelf) and the whole thing attached to the mobile base with 4 lag screws. Also, I added a $25 Irwin bimetal 10-14 TPI variable pitch blade that cuts through aluminum like a lightsaber.
Fig. 5 Here it is in its upright position. It is very stable now, even when upright - amazing what moving the wheels just a few inches to the right will do. Total cost for this metal killer: $50 (Craigslist) + $3 (switch) + $15 (base) + $25 (new blade) + $1 (brush and pan) = $94. OK, so that's a bit of a gloat, but I just wanted to show how one of these could be made much more useful with a little TLC. The main thing when looking at a "bargain" is to make sure the motor and gearbox are ok, and the blade guides are ok. Not that those problems couldn't be fixed, but you might be closer to new price territory if you have to fix that much.
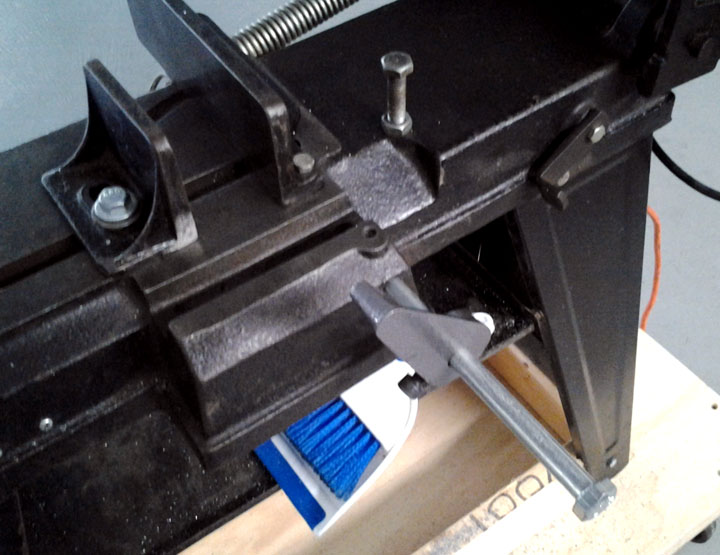
Fig. 6 Although the saw was missing its work stop assembly, a member of the 4x6 bandsaw yahoo group, Ed Kadlec, was kind enough to send me a stop casting left over from a saw he used to have. That, plus a 5/16 hex set screw and a long 1/2 inch bolt with the threads sawn off competes the stop mechanism. Fig. 7 Two later improvements - a magnetic hook for the dustpan and brush, and a cookie sheet clamped at the back of the shelf by a spring clamp, to collect parts and chips. It seems to get about 90% of them.
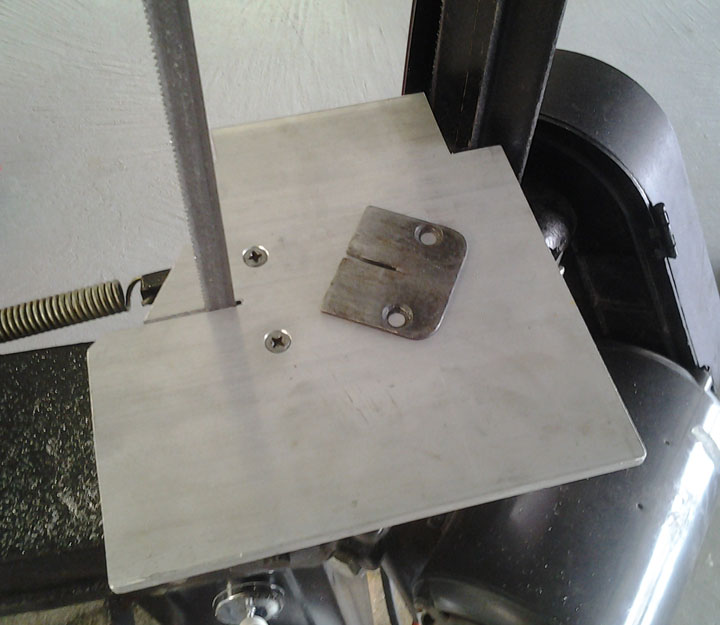
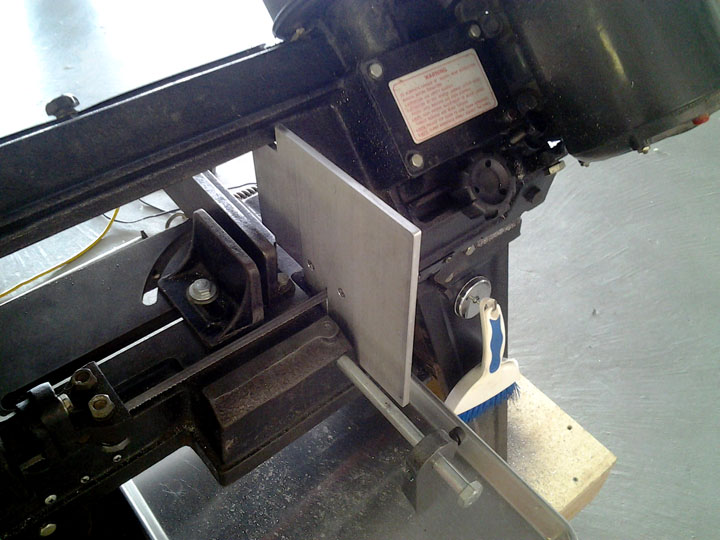
Fig. 8 Another later improvement - a vertical mode cutting table. The original "table" as shown in use back in Figure 5 provided very little space in which to brace material for horizontal orientation. Above shows that original "table" as the small thin piece of steel with two holes laying in the middle of the large aluminum plate. That "table" was removed and replaced with a 1/4 inch plate of 6061 aluminum cut to its (roughly) maximum possible size while still being able to lower the saw to the horizontal position without removing it. I determined the outline of the table by starting with a piece of cardboard and simply clipped away parts that interfered with movement. Some later versions of this saw came with a stamped sheet metal table, but this one didn't. Now there is enough room to clamp a fence along the outside edge for straight long cuts.
Fig. 9 Here the saw is closed for horizontal use and the table can be left in place. I thought about using a thicker piece for the table with a pocket slot on it for a miter slide, but its already about as thick as it can get - the bearing guide is almost all the way back and there is very little clearance between the plate and the cast frame where the work stop bolt is inserted, but the work stop arm can still be fully adjusted in and out. |